🛠️ Calculator: Library
The calculator code contains two parts:
Code for the calculator itself
Code for testing the calculator
We want to keep tests separate from the actual component’s code. Users shouldn’t need to include our tests when they use the component.
So we’ll create two files:
calculator.js: For storing the calculator’s codecalculator.test.js: For testing the calculator
We will start by importing calculator.js into main.js.
<script type="module" src="js/main.js"></script>
import './calculator.js'
Creating the Calculator
When we test UI, we need to make sure the test uses the same HTML as the actual calculator. The easiest way to do this is to create the HTML with JavaScript.
We’ll use a function called createCalculator to create the HTML.
function createCalculator () {
  // ...
}
Here’s the code that goes into createCalculator. You should be able to create this code by yourself at this point. (See your index.html file for the required HTML).
function createCalculator () {
const calculator = document.createElement('div')
calculator.classList.add('calculator')
calculator.tabIndex = 0
calculator.innerHTML = `
<div class="calculator__display">0</div>
<div class="calculator__keys">
<button tabindex="-1" data-key="plus" data-button-type="operator"> + </button>
<button tabindex="-1" data-key="minus" data-button-type="operator"> − </button>
<button tabindex="-1" data-key="times" data-button-type="operator"> × </button>
<button tabindex="-1" data-key="divide" data-button-type="operator"> ÷ </button>
<button tabindex="-1" data-key="1" data-button-type="number"> 1 </button>
<button tabindex="-1" data-key="2" data-button-type="number"> 2 </button>
<button tabindex="-1" data-key="3" data-button-type="number"> 3 </button>
<button tabindex="-1" data-key="4" data-button-type="number"> 4 </button>
<button tabindex="-1" data-key="5" data-button-type="number"> 5 </button>
<button tabindex="-1" data-key="6" data-button-type="number"> 6 </button>
<button tabindex="-1" data-key="7" data-button-type="number"> 7 </button>
<button tabindex="-1" data-key="8" data-button-type="number"> 8 </button>
<button tabindex="-1" data-key="9" data-button-type="number"> 9 </button>
<button tabindex="-1" data-key="0" data-button-type="number"> 0 </button>
<button tabindex="-1" data-key="decimal" data-button-type="decimal"> . </button>
<button tabindex="-1" data-key="clear" data-button-type="clear"> AC </button>
<button tabindex="-1" data-key="equal" data-button-type="equal"> = </button>
</div>
</div>
`
return calculator
}
We will create this HTML inside a Calculator Factory Function.
export default function Calculator () {
  const calculatorElement = createCalculator()

  // ...
}
We will export it so both users and tests can use this HTML:
function Calculator () {
  const calculatorElement = createCalculator()

  const calculator = {
    element: calculatorElement
  }

  return calculator
}
We can put the calculator in the DOM like this:
// main.js
import Calculator from './calculator.js'

// Create calculator
const calculator = Calculator().element

// Add calculator to DOM
const container = document.querySelector('.container')
container.appendChild(calculator)
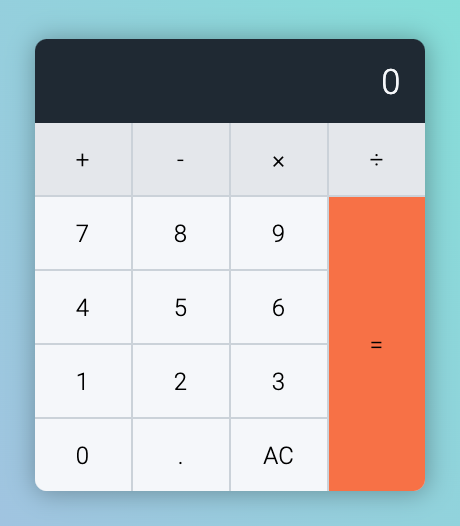
You should see the Calculator in the DOM at this point:
Making the calculator work
We need an event listener to make the calculator work. Here’s the one we wrote previously:
calculatorButtonsDiv.addEventListener('click', event => {
  if (!event.target.closest('button')) return
  const button = event.target
  const { buttonType } = button.dataset

  // Release operator pressed state
  const operatorKeys = [...calculatorButtonsDiv.children]
    .filter(button => button.dataset.buttonType === 'operator')
  operatorKeys.forEach(button => button.classList.remove('is-pressed'))

  if (buttonType !== 'clear') {
    const clearButton = calculator.querySelector('[data-button-type=clear]')
    clearButton.textContent = 'CE'
  }

  switch (buttonType) {
    case 'clear': handleClearKey(calculator, button); break
    case 'number': handleNumberKeys(calculator, button); break
    case 'decimal': handleDecimalKey(calculator); break
    case 'operator': handleOperatorKeys(calculator, button); break
    case 'equal': handleEqualKey(calculator); break
  }

  calculator.dataset.previousButtonType = buttonType
})
We will create the same event listener inside Calculator.
function Calculator () {
  const calculatorElement = createCalculator()
  const calculatorButtonsDiv = calculatorElement.querySelector('.calculator__keys')

  // ...

  calculatorButtonsDiv.addEventListener('click', event => {/* ... */})

  return calculator
}
We can create a method for this callback. We’ll call this method handleClick.
function Calculator () {
  // Declare Variables

  const calculator = {
    // ...
    handleClick(event) {/* ... */}
  }

  calculatorButtonsDiv.addEventListener('click', calculator.handleClick)

  return calculator
}
We will copy the code we wrote into handleClick.
function Calculator () {
  // Declare Variables

  const calculator = {
    // ...
    handleClick(event) {
      if (!event.target.closest('button')) return
      const button = event.target
      const { buttonType } = button.dataset

      // Release operator pressed state
      const operatorKeys = [...calculatorButtonsDiv.children]
        .filter(button => button.dataset.buttonType === 'operator')
      operatorKeys.forEach(button => button.classList.remove('is-pressed'))

      if (buttonType !== 'clear') {
        const clearButton = calculator.querySelector('[data-button-type=clear]')
        clearButton.textContent = 'CE'
      }

      switch (buttonType) {
        case 'clear': handleClearKey(calculator, button); break
        case 'number': handleNumberKeys(calculator, button); break
        case 'decimal': handleDecimalKey(calculator); break
        case 'operator': handleOperatorKeys(calculator, button); break
        case 'equal': handleEqualKey(calculator); break
      }

      calculator.dataset.previousButtonType = buttonType
    }
  }

  // Add Event Listeners
  // Return the calculator
}
Next, we need to change all instances of calculator in handleClick to calculatorElement. We do this because calculatorElement points to the HTML element.
function Calculator () {
  // Declare Variables

  const calculator = {
    // ...
    handleClick(event) {
      if (!event.target.closest('button')) return
      const button = event.target
      const { buttonType } = button.dataset

      // Release operator pressed state
      const operatorKeys = [...calculatorButtonsDiv.children]
        .filter(button => button.dataset.buttonType === 'operator')
      operatorKeys.forEach(button => button.classList.remove('is-pressed'))

      if (buttonType !== 'clear') {
        const clearButton = calculatorElement.querySelector('[data-button-type=clear]')
        clearButton.textContent = 'CE'
      }

      switch (buttonType) {
        case 'clear': handleClearKey(calculatorElement, button); break
        case 'number': handleNumberKeys(calculatorElement, button); break
        case 'decimal': handleDecimalKey(calculatorElement); break
        case 'operator': handleOperatorKeys(calculatorElement, button); break
        case 'equal': handleEqualKey(calculatorElement); break
      }

      calculatorElement.dataset.previousButtonType = buttonType
    }
  }

  // Add Event Listeners
  // Return the calculator
}
We can declare operatorKeys and clearButton upfront in Calculator. When we do this, we simplify handleClick a bit.
function Calculator () {
  // Declare Variables
  // ...
  const operatorKeys = [...calculatorButtonsDiv.children]
    .filter(button => button.dataset.buttonType === 'operator')
  const clearButton = calculatorElement.querySelector('[data-button-type=clear]')

  const calculator = {
    // ...
    handleClick(event) {
      if (!event.target.closest('button')) return
      const button = event.target
      const { buttonType } = button.dataset

      operatorKeys.forEach(button => button.classList.remove('is-pressed'))

      if (buttonType !== 'clear') {
        clearButton.textContent = 'CE'
      }
      // ...
    }
  }

  // Add Event Listeners
  // Return the calculator
}
Next, we need to work on handling keys. We will handle number keys first, so comment out the rest.
function Calculator () {
  // Declare Variables

  const calculator = {
    // ...
    handleClick(event) {
      // ...
      switch (buttonType) {
        // case 'clear': handleClearKey(calculatorElement, button); break
        case 'number': handleNumberKeys(calculatorElement, button); break
        // case 'decimal': handleDecimalKey(calculatorElement); break
        // case 'operator': handleOperatorKeys(calculatorElement, button); break
        // case 'equal': handleEqualKey(calculatorElement); break
      }

      // ...
    }
  }

  // Add Event Listeners
  // Return the calculator
}
Handling Number Keys
We used the handleNumberKeys function to handle number keys previously. Here’s what it looks like:
function handleNumberKeys (calculator, button) {
  const displayValue = getDisplayValue()
  const { previousButtonType } = calculator.dataset
  const { key } = button.dataset

  if (displayValue === '0') {
    display.textContent = key
  } else {
    display.textContent = displayValue + key
  }

  if (previousButtonType === 'operator') {
    display.textContent = key
  }

  if (previousButtonType === 'equal') {
    resetCalculator()
    display.textContent = key
  }
}
We can copy this function into Calculator as a method.
function Calculator () {
  // Declare Variables

  const calculator = {
    // ...
    handleNumberKeys (calculatorElement, button) {
      const displayValue = getDisplayValue()
      const { previousButtonType } = calculator.dataset
      const { key } = button.dataset

      if (displayValue === '0') {
        display.textContent = key
      } else {
        display.textContent = displayValue + key
      }

      if (previousButtonType === 'operator') {
        display.textContent = key
      }

      if (previousButtonType === 'equal') {
        resetCalculator()
        display.textContent = key
      }
    },

    // Listener Callbacks
  }

  // Add Event Listeners
  // Return the calculator
}
Next, we need to change calculator to calculatorElement. You should know the reason why.
function Calculator () {
  // Declare Variables

  const calculator = {
    // ...
    handleNumberKeys (calculatorElement, button) {
      const displayValue = getDisplayValue()
      const { previousButtonType } = calculatorElement.dataset
      const { key } = button.dataset
      // ...
    },

    // Listener Callbacks
  }

  // Add Event Listeners
  // Return the calculator
}
We don’t need to pass calculatorElement into handleNumberKeys since it is already in the lexical scope. We can omit this parameter.
function Calculator () {
  // Declare Variables

  const calculator = {
    // ...
    handleNumberKeys (button) { /*...*/ },

    handleClick () {
      switch(buttonType) {
        case 'number': calculator.handleNumberKeys(button)
      }
    }
  }

  // Add Event Listeners
  // Return the calculator
}
Getting display value
handleNumberKeys needs a getDisplayValue function to work. Again, we can copy getDisplayValue from our old code into Calculator.
function Calculator () {
  // Declare Variables

  const calculator = {
    // ...
    getDisplayValue () {
      return calculatorElement.querySelector('.calculator__display').textContent
    },

    // Other methods
    // Listener Callbacks
  }

  // Add Event Listeners
  // Return the calculator
}
We can make getDisplayValue easier to read by declaring the display upfront in Calculator.
function Calculator () {
  // Declare Variables
  const display = calculatorElement.querySelector('.calculator__display')

  const calculator = {
    // ...
    getDisplayValue () {
      return display.textContent
    },

    // Other methods
    // Listener Callbacks
  }

  // Add Event Listeners
  // Return the calculator
}
We can change getDisplayValue into a getter function to make it easier to use.
function Calculator () {
  // Declare variables

  const calculator = {
    // ...
    get displayValue () {
      return display.textContent
    },

    // Other methods
    // Listener Callbacks
  }

  // Add Event Listeners
  // Return the calculator
}
We’ll use displayValue like this:
function Calculator () {
  // Declare variables

  const calculator = {
    // ...

    handleNumberKeys (button) {
      const displayValue = calculator.displayValue
      // ...
    }

    // Other methods
    // Listener Callbacks
  }

  // Add Event Listeners
  // Return the calculator
}
Setting display value
In handleNumberKeys, we changed the display’s value by setting the textContent property:
function Calculator () {
  // Declare variables

  const calculator = {
    // ...
    handleNumberKeys (button) {
      // ...
      if (displayValue === '0') {
        display.textContent = key
      } else {
        display.textContent = displayValue + key
      }

      if (previousButtonType === 'operator') {
        display.textContent = key
      }

      if (previousButtonType === 'equal') {
        resetCalculator()
        display.textContent = key
      }
    }

    // Other methods
    // Listener Callbacks
  }

  // Add Event Listeners
  // Return the calculator
}
We can create a setter function to make this more intuitive:
function Calculator () {
  // Declare variables
  const calculator = {
    // ...
    set displayValue () {
       display.textContent = value
    },

    // Other methods
    // Listener Callbacks
  }

  // Add Event Listeners
  // Return the calculator
}
We’ll use the displayValue setter function like this:
function Calculator () {
  // Declare variables
  const calculator = {
    // ...
    handleNumberKeys (button) {
      // ...
      if (displayValue === '0') {
        calculator.displayValue = key
      } else {
        calculator.displayValue = displayValue + key
      }

      if (previousButtonType === 'operator') {
        calculator.displayValue = key
      }

      if (previousButtonType === 'equal') {
        resetCalculator()
        calculator.displayValue = key
      }
    }

    // Other methods
    // Listener Callbacks
  }

  // Add Event Listeners
  // Return the calculator
}
Resetting the calculator
handleNumberKeys also need a resetCalculator function to work. We’ll create a method for this too.
function Calculator () {
  // Declare variables
  const calculator = {
    // ...
    resetCalculator() {
      // ...
    },

    handleNumberKeys (button) {
      // ...
      if (previousButtonType === 'equal') {
        calculator.resetCalculator()
        calculator.displayValue = key
      }
    }

    // Other methods
    // Listener Callbacks
  }

  // Add Event Listeners
  // Return the calculator
}
Here’s what we wrote for resetCalculator previously:
const resetCalculator = _ => {
  pressKeys('clear', 'clear')
  console.assert(getDisplayValue() === '0', 'Clear calculator')
  console.assert(!calculator.dataset.firstValue, 'No first value')
  console.assert(!calculator.dataset.operator, 'No operator value')
  console.assert(!calculator.dataset.modifierValue, 'No operator value')
}
The four console.assert lines are for testing the calculator. We don’t want to have test code inside the actual Calculator, so we’ll only copy the first line.
function Calculator () {
  // Declare variables

  const calculator = {
    // ...
    resetCalculator() {
      pressKeys('clear', 'clear')
    }

    // Other methods
    // Listener Callbacks
  }

  // Add Event Listeners
  // Return the calculator
}
We know resetCalculator needs pressKeys to work. We’ll copy pressKeys into Calculator.
function Calculator () {
  // Declare variables
  const calculator = {
    // ...
    pressKeys (keys) {
      keys.forEach(pressKey)
    },

    resetCalculator() {
      calculator.pressKeys('clear', 'clear')
    }

    // Other methods
    // Listener Callbacks
  }

  // Add Event Listeners
  // Return the calculator
}
From here, we know pressKeys needs a pressKey function to work. We’ll copy it in as well.
function Calculator () {
  // Declare variables
  const calculator = {
    // ...
    pressKey (key) {
      document.querySelector(`[data-key="${key}"]`).click()
    },

    pressKeys (keys) {
      keys.forEach(calculator.pressKey)
    },
    // Other methods
    // Listener Callbacks
  }

  // Add Event Listeners
  // Return the calculator
}
Let’s make the querySelector statement more precise by searching within calculatorElement instead of document.
function Calculator () {
  // Declare variables

  const calculator = {
    // ...
    pressKey (key) {
      calculatorElement.querySelector(`[data-key="${key}"]`).click()
    },

    // Other methods
    // Listener Callbacks
  }

  // Add Event Listeners
  // Return the calculator
}
The calculator should now work with number keys now.
Testing Number keys
We need to make sure the test uses the same HTML as the actual calculator. We made this possible by creating and exporting the HTML in Calculator. What’s next is to create another Calculator instance inside calculator.test.js.
// calculator.test.js
import Calculator from './calculator.js'

const calculator = Calculator()
Normally, we run tests with a test runner. But setting up a test running is out of scope of this course. To make things simple, we will run the test file by importing it into main.js.
// main.js
import './calculator.test.js`
Next, we want to test a Number key. Here, we want to:
Press a number key
Check the display
Make sure the display value is what we expect
We already have a runTest function that lets us do this. Here’s the code we wrote previously:
function runTest (test) {
  pressKeys(...test.keys)
  console.assert(getDisplayValue() === test.result, test.message)
  resetCalculator()
}
runTest needs two functions — pressKeys and resetCalculator — to work. These functions are already built into the Calculator as methods.
function runTest (test) {
  calculator.pressKeys(...test.keys)
  console.assert(getDisplayValue() === test.result, test.message)
  calculator.resetCalculator()
}
runTest also needs getDisplayValue to work. We exposed this display value via a getter function in Calculator. We can use this getter function in runTest:
function runTest (test) {
  calculator.pressKeys(...test.keys)
  console.assert(calculator.displayValue === test.result, test.message)
  calculator.resetCalculator()
}
We can then copy our Number key test cases into calculator.test.js.
const tests = [
// Test Number Keys
{
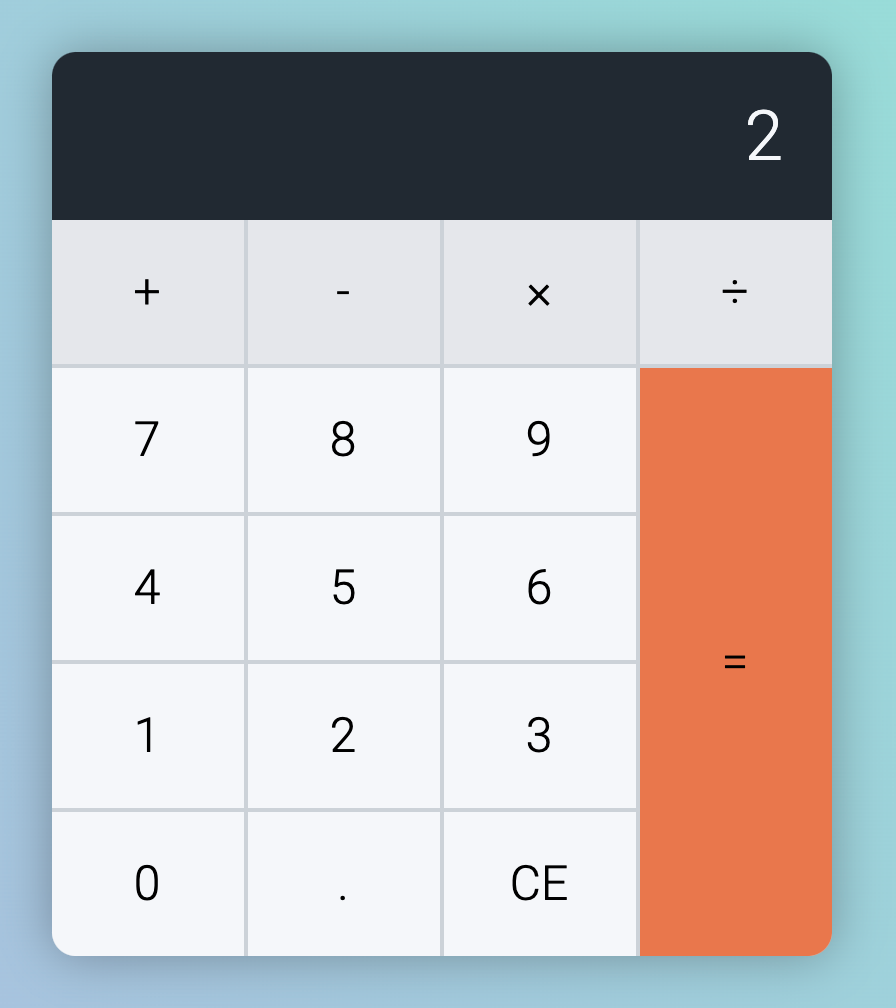
message: 'Number key',
keys: ['2'],
result: '2'
}
]
And we’ll run the tests like this:
tests.forEach(runTest)
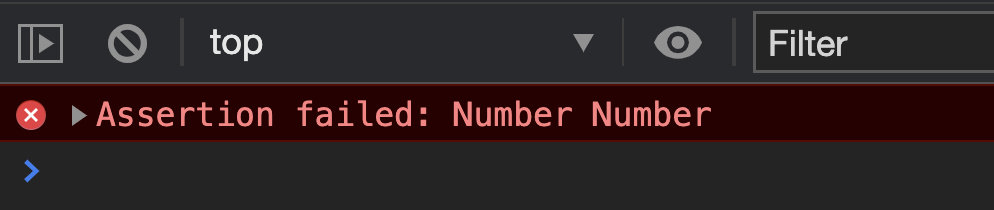
This should work. There aren’t any errors. But you’ll get an error if you add the second test into the mix:
const tests = [
  // Test Number Keys
  {
    message: 'Number key',
    keys: ['2'],
    result: '2'
  }, {
    message: 'Number Number',
    keys: ['3', '5'],
    result: '35'
  }
]
But why?
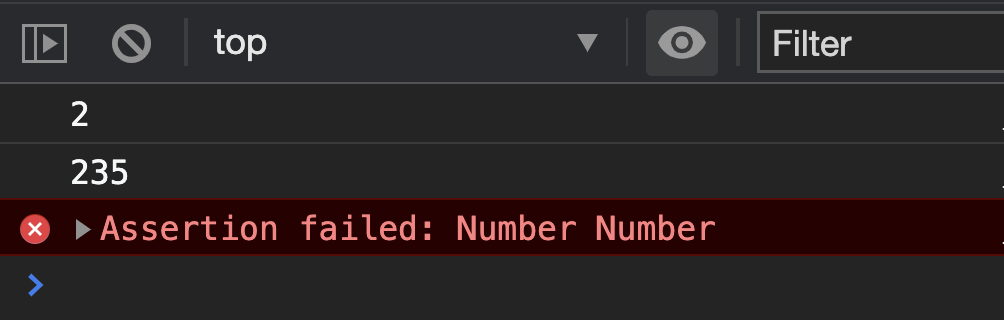
If you console.log the display value, you’ll see 235 instead of 35. The 2 comes from the previous test, which means resetCalculator isn’t working.
function runTest (test) {
  calculator.pressKeys(...test.keys)
  console.log(calculator.displayValue)
  console.assert(calculator.displayValue === test.result, test.message)
  calculator.resetCalculator()
}
resetCalculator doesn’t work for a good reason… It uses the clear key, but we haven’t implemented the clear key for this refactored version yet!
We’ll implement the clear key in the next lesson.