🛠️ Datepicker: Previous and Next buttons

Hey ,

I'm thrilled to help you learn JavaScript. Unfortunately, you've landed on a page where you cannot access with your current purchase.

Please upgrade (use this link) access this content.

I'm super eager to help you learn more!

🛠️ Datepicker: Previous and Next buttons

You can create a Datepicker for any month of any year. The next thing is to allow users to switch between months with the previous and next buttons.

For the buttons to work, we need to add an event listener to .datepicker__buttons.

Adding the event listener

If you recall from the previous lesson, we created the Datepicker this way:

// Add the datepicker into the DOM
form.appendChild(createDatepicker(date))

We don’t want to ask users to create the event listeners themselves. We want to create the listeners for them. To do this, we create event listeners inside createDatepicker.

Event listeners can only be added to Nodes. This means we can only create an event listener after creating the datepicker’s innerHTML.

const createDatepicker = date => {
  // ...
  datepicker.innerHTML = /*...*/

  const previousNextButtons = datepicker.querySelector('datepicker__buttons')

  previousNextButtons.addEventListener('click', event => {
    // ...
  })
  // ...
}

Next button functionality

When a user clicks on the next button, we want to show next month’s calendar. This means we must:

  1. Change the textContent and datetime attribute of the year-month indicator
  2. Create a new date grid
previousNextButtons.addEventListener('click', event => {
  if (!event.target.matches('button')) return

  if (event.target.matches('.datepicker__prev')) {
    // Show previous month
  }

  if (event.target.matches('.datepicker__next')) {
    // Show next month
  }
})

Changing the year-month indicator

We need to know what’s the current year-month on the Datepicker. We can get this information from the datetime attribute.

if (event.target.matches('.datepicker__next')) {
  const time = datepicker.querySelector('.datepicker__year-month').firstElementChild
  const datetime = time.getAttribute('datetime')
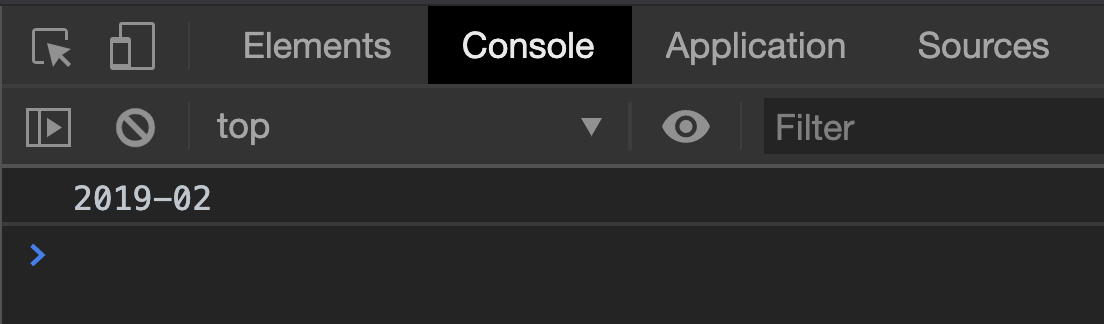
  console.log(datetime)
}
Logs the datetime. Shows 2019-02.

We need to create a Date from this datetime attribute. The simplest way is to use new Date with this datetime attribute value.

if (event.target.matches('.datepicker__next')) {
  const timeEl = datepicker.querySelector('.datepicker__year-month').firstElementChild
  const datetime = timeEl.getAttribute('datetime')
  const currentDate = new Date(datetime)
  console.log(currentDate)
}
Logs date created with new Date(datetime). Shows a date string in Chrome.

This works. But you should try not to create dates with date strings. Things will break if you make a small mistake. You should always create dates with the arguments method. I wrote about this back in “Setting a specific date” lesson.

To create a date with arguments, we can create a new function called datetimeToDate. This name of this function explains we’re converting a datetime attribute into a Date object.

const datetimeToDate = datetime => {
  // ...
}

We know the datetime attribute has the format: YYYY-MM (like 2019-02). If we split the datetime by -, we can get the year and month easily.

const datetimeToDate = datetime => {
  const [year, month] = datetime.split('-')
  console.log(year) // 2019
  console.log(month) // 02
}

datetimeToDate('2019-02')

year and month values are strings. If we want to use the arguments approach to create a new Date, we need to convert these strings into numbers.

We can convert them into numbers with map and parseInt.

const datetimeToDate = datetime => {
  const [year, month] = datetime.split('-')
    .map(num => parseInt(num))

  console.log(year) // 2019
  console.log(month) // 02
}

datetimeToDate('2019-02')

To create a date from Datetime, we can pass the year and month arguments into new Date.

const datetimeToDate = datetime => {
  const [year, month] = datetime.split('-')
    .map(num => parseInt(num))

  // Remember, `month` needs to be zero-indexed
  return new Date(year, month - 1)
}

Using it:

if (event.target.matches('.datepicker__next')) {
  // ...
  const currentDate = datetimeToDate(datetime)
}

Once we know the current date, we can use its value to create a Date for the next month.

if (event.target.matches('.datepicker__next')) {
  // ...
  const currentDate = datetimeToDate(datetime)
  const year = currentDate.getFullYear()
  const month = currentDate.getMonth()
  const targetDate = new Date(year, month + 1)
}

Once we know what’s the next month, we can change the year-month indicator’s textContent and datetime attributes.

if (event.target.matches('.datepicker__next')) {
  // ...
  const targetDate = new Date(year, month + 1)
  const targetMonth = targetDate.getMonth()
  const monthName = monthsInAYear[targetMonth]
  const datetimeMonth = (targetMonth + 1).toString().padStart(2, '0')

  // Update Text Content and datetime attribute
  time.textContent = `${monthName} ${year}`
  time.setAttribute('datetime', `${year}-${datetimeMonth}"`)
}
Clicks next button. Changes text from February 2019 to March 2019. Changes datetime attribute from 2019-02 to 2019-03.

Change the date grid

It’s simple to update the date grid once you know what’s the next month. All we need to do is feed targetDate into createDateGridHTML.

if (event.target.matches('.datepicker__next')) {
  // ...
  // ...
  const dategrid = datepicker.querySelector('.datepicker__date-grid')
  dategrid.innerHTML = createDateGridHTML(targetDate)
}
Displayed calendar increases by one month when the user clicks on the next button

Previous button functionality

You should be able to write the code for the previous button on your own. It uses the same concept.

if (event.target.matches('.datepicker__previous')) {
  // 1. Find out what's the currently selected month
  const time = datepicker.querySelector('.datepicker__year-month').firstElementChild
  const datetime = time.getAttribute('datetime')
  const currentDate = datetimeToDate(datetime)

  // 2. Figure out what's the previous month
  const year = currentDate.getFullYear()
  const month = currentDate.getMonth()
  const targetDate = new Date(year, month - 1)

  // 3. Update the year-month indicator
  const targetMonth = targetDate.getMonth()
  const monthName = monthsInAYear[targetMonth]
  const datetimeMonth = (targetMonth + 1).toString().padStart(2, '0')
  time.textContent = `${monthName} ${year}`
  time.setAttribute('datetime', `${year}-${datetimeMonth}"`)

  // 4. Update the date-grid
  const dategrid = datepicker.querySelector('.datepicker__date-grid')
  dategrid.innerHTML = createDateGridHTML(targetDate)
}
Displayed calendar reduces by one month when the user clicks on the previous button

Cleaning up the code

At this point, you’ll notice we do two things when a user clicks the previous or next button.

  1. Change the <time> element’s textContent and datetime attribute
  2. Change the date grid

To change these two things, we need to find the target date. Once we have the target date, we can use functions to change the time element and date grid.

Getting the current date

We used these get the current date in both if statements.

const time = datepicker.querySelector('.datepicker__year-month').firstElementChild
const datetime = time.getAttribute('datetime')
const currentDate = datetimeToDate(datetime)

We can group them into a function.

const getDateFromYearMonthIndicator = _ => {
  const time = datepicker.querySelector('.datepicker__year-month').firstElementChild
  const datetime = time.getAttribute('datetime')
  return datetimeToDate(datetime)
}

If we put getDateFromYearMonthIndicator inside the Datepicker, we don’t need to pass in the datepicker variable.

const createDatepicker = date => {
  // ...
  const datepicker.innerHTML = // ...

  // ...

  const getDateFromYearMonthIndicator = _ => {
    const time = datepicker.querySelector('.datepicker__year-month').firstElementChild
    const datetime = time.getAttribute('datetime')
    return datetimeToDate(datetime)
  }
}

Using it:

previousNextButtons.addEventListener('click', event => {
  const currentDate = getDateFromYearMonthIndicator()
  // ...
}

Getting the target date

We used these to get the target date

previousNextButtons.addEventListener('click', event => {
  const year = currentDate.getFullYear()
  const month = currentDate.getMonth()

  if (event.target.matches('.datepicker__previous')) {
    const targetDate = new Date(year, month - 1)
    // ...
  }

  if (event.target.matches('.datepicker__next')) {
    const targetDate = new Date(year, month + 1)
  }
})

We can’t simplify this into a function that makes sense, so we’ll leave them. The best we can use a ternary operator instead of two if statements.

previousNextButtons.addEventListener('click', event => {
  // ...
  const year = currentDate.getFullYear()
  const month = currentDate.getMonth()

  // Finds the previous or next month
  const targetDate = event.target.matches('.datepicker__previous')
    ? new Date(year, month - 1)
    : new Date(year, month + 1)
  // ...
})

Updating the time element

We used these to update the time element’s textContent and datetime attribute.

const year = date.getFullYear()
const targetMonth = targetDate.getMonth()
const monthName = monthsInAYear[targetMonth]
const datetimeMonth = (targetMonth + 1).toString().padStart(2, '0')

time.textContent = `${monthName} ${year}`
time.setAttribute('datetime', `${year}-${datetimeMonth}"`)

We can put this into a function

const updateYearMonthIndicatorTimeElement = date => {
  const time = datepicker.querySelector('.datepicker__year-month').firstElementChild

  const year = date.getFullYear()
  const targetMonth = date.getMonth()
  const monthName = monthsInAYear[targetMonth]
  const datetimeMonth = (targetMonth + 1).toString().padStart(2, '0')

  time.textContent = `${monthName} ${year}`
  time.setAttribute('datetime', `${year}-${datetimeMonth}"`)
}

Using it:

previousNextButtons.addEventListener('click', event => {
  // ...
  updateYearMonthIndicatorTimeElement(targetDate)
  // ...
})

Updating the date grid

We used these to update the date grid.

previousNextButtons.addEventListener('click', event => {
  // ...
  if (event.target.matches('.datepicker__previous')) {
    const dategrid = datepicker.querySelector('.datepicker__date-grid')
    const targetDate = new Date(year, month - 1)
    dategrid.innerHTML = createDateGridHTML(targetDate)
  }

  if (event.target.matches('.datepicker__next')) {
    const dategrid = datepicker.querySelector('.datepicker__date-grid')
    const targetDate = new Date(year, month + 1)
    dategrid.innerHTML = createDateGridHTML(targetDate)
  }
})

Since targetDate is declared outside of the if statements, we can create the date grid outside of any if statements.

previousNextButtons.addEventListener('click', event => {
  // ...
  const targetDate = event.target.matches('.datepicker__previous')
      ? new Date(year, month - 1)
      : new Date(year, month + 1)

  // ...
  const dategrid = datepicker.querySelector('.datepicker__date-grid')
  dategrid.innerHTML = createDateGridHTML(targetDate)
})

More clean up

There are a few more things we can do to clean up the code.

Code for the year-month indicator

The code for making the year-month indicator and the code for updating the year-month indicator were similar.

In both cases, you need to set year, month, monthName, and datetimeMonth variables.

// Making the time element
const createDatepicker = date => {
  const year = date.getFullYear()
  const month = date.getMonth()
  const monthName = monthsInAYear[month]
  const datetimeMonth = (month + 1).toString().padStart(2, '0')

  // ...
  const calendar = `
    <div class="datepicker__calendar">
      <div class="datepicker__year-month">
        <time datetime="${year}-${datetimeMonth}">${monthName} ${year}</time>
      </div>
      <!-- ... -->
    </div>
  `
}
// Updating the time element
const updateYearMonthIndicatorTimeElement = date => {
  const time = datepicker.querySelector('.datepicker__year-month').firstElementChild

  const year = date.getFullYear()
  const targetMonth = date.getMonth()
  const monthName = monthsInAYear[targetMonth]
  const datetimeMonth = (targetMonth + 1).toString().padStart(2, '0')

  time.textContent = `${monthName} ${year}`
  time.setAttribute('datetime', `${year}-${datetimeMonth}"`)
}

If we returned <time> element as a HTML string in the function, we can use it to create and update the year-month indicator.

We’ll change the function’s name from updateYearMonthIndicatorTimeElement to creaetYearMonthIndicatorTimeElement to go with the return statement.

const createYearMonthIndicatorTimeElement = date => {
  const year = date.getFullYear()
  const targetMonth = date.getMonth()
  const monthName = monthsInAYear[targetMonth]
  const datetimeMonth = (targetMonth + 1).toString().padStart(2, '0')

  return `
    <time datetime="${year}-${datetimeMonth}">${monthName} ${year}</time>
  `
}

Also, did you notice we only used monthsInAYear inside createYearMonthIndicatorTimeElement? Let’s put monthsInAYear inside this function to make the code neater.

const createYearMonthIndicatorTimeElement = date => {
  const monthsInAYear = [
    'January',
    'February',
    'March',
    'April',
    'May',
    'June',
    'July',
    'August',
    'September',
    'October',
    'November',
    'December'
  ]

  const year = date.getFullYear()
  const targetMonth = date.getMonth()
  const monthName = monthsInAYear[targetMonth]
  const datetimeMonth = toTwoDigitString(targetMonth + 1)

  return `
      <time datetime="${year}-${datetimeMonth}">${monthName} ${year}</time>
    `
}

Using it:

// Making the time element
const createDatepicker = date => {
  const year = date.getFullYear()
  const month = date.getMonth()
  const monthName = monthsInAYear[month]
  const datetimeMonth = (month + 1).toString().padStart(2, '0')

  // ...
  const calendar = `
    <div class="datepicker__calendar">
      <div class="datepicker__year-month">
        ${createYearMonthIndicatorTimeElement(date)}
      </div>
      <!-- ... -->
    </div>
  `
}
// Updating the time element
previousNextButtons.addEventListener('click', event => {
  const targetDate = event.target.matches('.datepicker__previous')
      ? new Date(year, month - 1)
      : new Date(year, month + 1)
  // ...
  const yearMonthIndicator = datepicker.querySelector('.datepicker__year-month')
  yearMonthIndicator.innerHTML = createYearMonthIndicatorTimeElement(date)
})

Creating a two-digit string

We used this line of code three times to create a two-digit string for the datetime attribute.

// Used this twice
const datetimeMonth = (month + 1).toString().padStart(2, '0')

// Used this once
const datetimeDay = day.toString().padStart(2, '0')

We can create a function called toTwoDigitString so we don’t have to write so much.

const toTwoDigitString = number => {
  return number.toString().padStart(2, '0')
}

Using toTwoDigitString:

const datetimeMonth = toTwoDigitString(month + 1)
const datetimeDay = toTwoDigitString(day)

That’s it!