🛠️ Dota SPA: Building the filters
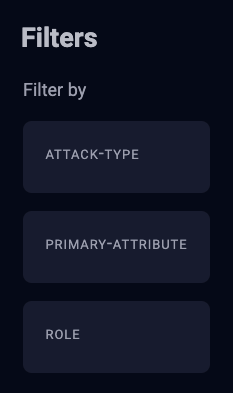
Filters have a complex HTML . They are made up of three separate types:
Attack Type
Primary Attribute
Role
We split the HTML into three divs like this:
<section class="filters">
  <h2 id="filters">Filters</h2>

  <fieldset class="flow">
    <legend>Filter by</legend>

    <div class="box filter-group" id="attack-type">...</div>
    <div class="box filter-group" id="primary-attribute">...</div>
    <div class="box filter-group" id="role">...</div>
  </fieldset>
</section>
In each div, we have one checkbox for each option.
<div class="box filter-group" id="attack-type">
  <p class="box__title">Attack Type</p>

  <div class="checkbox"><!-- Melee --></div>
  <div class="checkbox"><!-- Ranged --></div>
</div>

<!-- More checkboxes for other filter groups -->
Since Filters have complex HTML, it makes sense to put them inside a separate file. We’ll call it Filter.js.
Exporting and using filters
We’ll start by exporting the Filter component.
// Filter.js
import Tiny from './Tiny/tiny.js'

export default Tiny({
  template () {
    return '<p>Filters here</p>'
  }
})
We can import the filters like this
// main.js
import Filters from './Filters.js'
Then we add it to the main component like this:
Tiny({
// ...
components: {
Filters
},
template () {
return `
<!-- header -->
<main>
<div class="wrap">
<!-- site-title -->
<div class="sidebar-content">
<div class="sidebar flow">
<div tiny-component="Filters"></div>
</div>
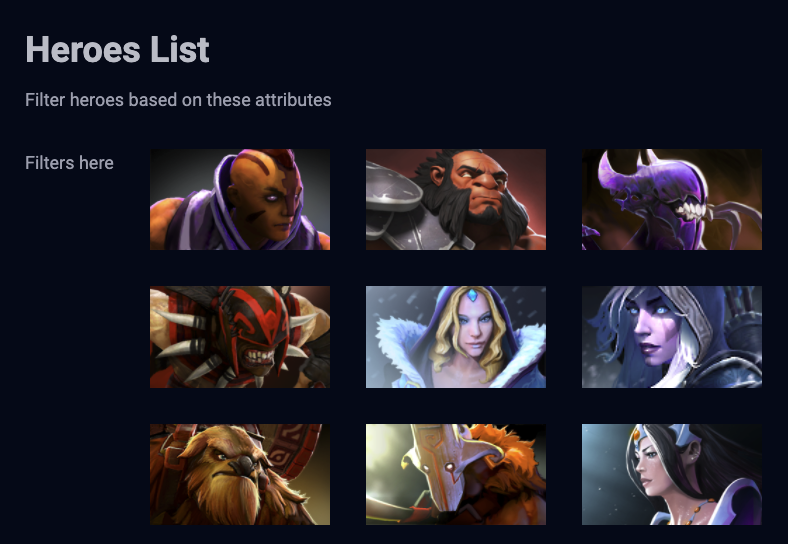
<div class="content">
<!-- Heroes List -->
</div>
</div>
</main>
`
}
})
Building the Filters
The simplest way to build the filters is to copy-paste all the HTML we’ve wrote into Filter.js. It’ll work, but we won’t be taking full advantage of what JavaScript is capable of.
export default Tiny({
  template () {
    // ALL the HTML we wrote before
  }
})
There are two ways of building the Filters.
Method 1
We know there are three groups of filters — attack-type, primary-attribute, and role. We can put these three filter groups into an array.
const filters = [
  {
    name: 'attack-type',
    values: ['melee', 'ranged']
  },
  {
    name: 'primary-attribute',
    values: ['strength', 'agility', 'intelligence']
  },
  {
    name: 'role',
    values: [
      'carry',
      'disabler',
      'durable',
      'escape',
      'initiator',
      'jungler',
      'nuker',
      'pusher',
      'support'
    ]
  }
]
We can then loop through this array to build the groups
Method 2
We can create each filter option in an object like state. In each option, we also write down it’s grouping, like this:
export default Tiny({
  state: {
    melee: { group: 'attack-type' },
    ranged: { group: 'attack-type' },
    strength: { group: 'primary-attribute' },
    agility: { group: 'primary-attribute' },
    intelligence: { group: 'primary-attribute' },
    carry: { group: 'role' },
    disabler: { group: 'role' },
    durable: { group: 'role' },
    escape: { group: 'role' },
    initiator: { group: 'role' },
    jungler: { group: 'role' },
    nuker: { group: 'role' },
    pusher: { group: 'role' },
    support: { group: 'role' }
  }
  // ...
})
If we use this method, we can label the three groups manually inside template so it’s clearer from a coding perspective.
Choosing between Method 1 and Method 2
Method 1 is intuitive from a thinking perspective — we loop through the groups to build the filters. But it requires more brainpower to understand the actual loop.
But Method 2 works too.
You can go with either method. Afterall, there’s more than one way to skin a cat.
We’ll go with Method 1 for this lesson.
Buliding the filter groups
First, we need to create the three groups of filters — attack type, primary attribute, and role.
We can create these groups by looping through filters.
export default Tiny({
  template () {
    return `
      <section class="filters"">
        <h2 id="filters">Filters</h2>

        <fieldset class="flow">
          <legend>Filter by</legend>
          ${filters
            .map(filterType => {
              return `
              <div class="box filter-group" id="${filterType.name}">
                <p class="box__title">${filterType.name}</p>
              </div>
            `
            })
            .join('')}
        </fieldset>
      </section>
    `
  }
})
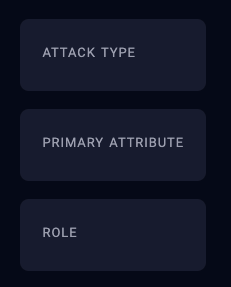
We need to strip away the - in each filter group. We can do this with the replace method.
export default Tiny({
  template () {
    return `
      <section class="filters"">
        <!-- ... -->

        <fieldset class="flow">
          <!-- ... -->
          ${filters
            .map(filterType => {
              return `
              <div class="box filter-group" id="${filterType.name}">
                <p class="box__title">${filterType.name.replace('-', ' ')}</p>
              </div>
            `
            })
            .join('')}
        </fieldset>
      </section>
    `
  }
})
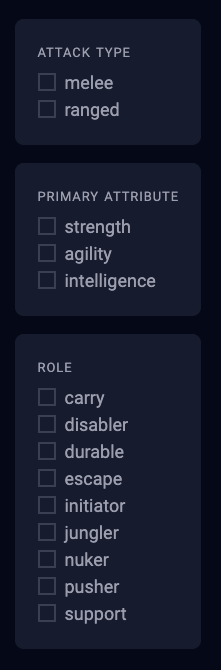
Building the checkboxes
Each checkbox has the following HTML.
<div class="checkbox">
  <input type="checkbox" id="VALUE" name="VALUE" />
  <label for="VALUE">
    <span class="checkbox__fakebox"></span>
    <svg height="1em" viewBox="0 0 20 15">
      <use xlink:href="checkmark"></use>
    </svg>
    <span>value</span>
  </label>
</div>
We need to replace VALUE with the actual value that is present in each filter type, like “melee” and “ranged” for example.
To do this, we loop through each possible filter value in each of the groups.
export default Tiny({
  template () {
    return `
      <section class="filters"">
        <!-- ... -->

        <fieldset class="flow">
          <!-- ... -->
           ${filters
             .map(filterType => {
               return `
              <div class="box filter-group" id="${filterType.name}">
                <p class="box__title">${filterType.name.replace('-', ' ')}</p>

                ${filterType.values
                  .map(value => {
                    return `
                    <div class="checkbox">
                      <input
                        type="checkbox"
                        id="${value}"
                        name="${value}"
                      >
                      <label for="${value}">
                        <span class="checkbox__fakebox"></span>
                        <svg height="1em" viewBox="0 0 20 15">
                          <use xlink:href="checkmark"></use>
                        </svg>
                        <span>${value}</span>
                      </label>
                    </div>
                  `
                  })
                  .join('')}
              </div>
            `
             })
             .join('')}
        </fieldset>
      </section>
    `
  }
})
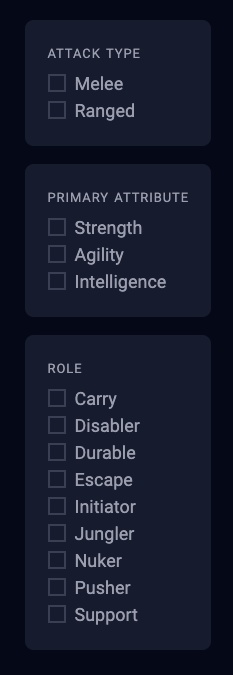
You should get this:
Next, we need to uppercase each value to match the original style. To uppercase each value, we can replace the first character with an uppercase letter with a combination of slice and toUpperCase.
<span>${value.slice(0, 1).toUpperCase() + value.slice(1)}</span>
Adding the checkmark
The checkboxes won’t work yet because we haven’t added the checkmark SVG into the DOM. The good news is we can add it to Filters.js instead of the entire HTML. This keeps the SVG close by — so we know what it is used for.
export default Tiny({
  template () {
    return `
      <!-- SVG for checkbox -->
      <svg height="1em" style="display: none">
        <symbol id="checkmark" viewBox="0 0 20 15">
          <title>Checkmark</title>
          <path
            d="M0 8l2-2 5 5L18 0l2 2L7 15z"
            fill="#bc4736"
            fill-rule="nonzero"
          />
        </symbol>
      </svg>`
  }
})
Your browser doesn't support embedded videos. Watch the video here instead.