🛠️ Google Maps Clone: Adding stopovers

Hey ,

I'm thrilled to help you learn JavaScript. Unfortunately, you've landed on a page where you cannot access with your current purchase.

Please upgrade (use this link) access this content.

I'm super eager to help you learn more!

🛠️ Google Maps Clone: Adding stopovers

Let’s say you want to travel to three places in Singapore. And you want to plot a route to all three places in the Google Maps clone.

The three places we’re going to use are:

  1. The Singapore Zoo
  2. Gardens by the bay
  3. Sentosa

To travel to three places, you use a feature in Google Maps called waypoints.

Waypoints

A waypoint is an intermediate point between the start and end of a journey. Using our three locations as an example, the points are:

  1. Startpoint: Singapore Zoo
  2. Waypoint: Gardens by the bay
  3. Endpoint: Sentosa

Google’s directions service lets you plot waypoints if you include a waypoints array. You can have up to 8 waypoints.

const request = {
  origin: '...',
  destination: '...',
  waypoints: [{/*...*/}],
  travelMode: 'DRIVING'
}

Each waypoint is an object that contains two properties:

  1. location: The address of the place
  2. stopover: This is a Boolean. If set to true, Google creates an intermediate point on the map. If set to false, Google plots a route that passes through this point.

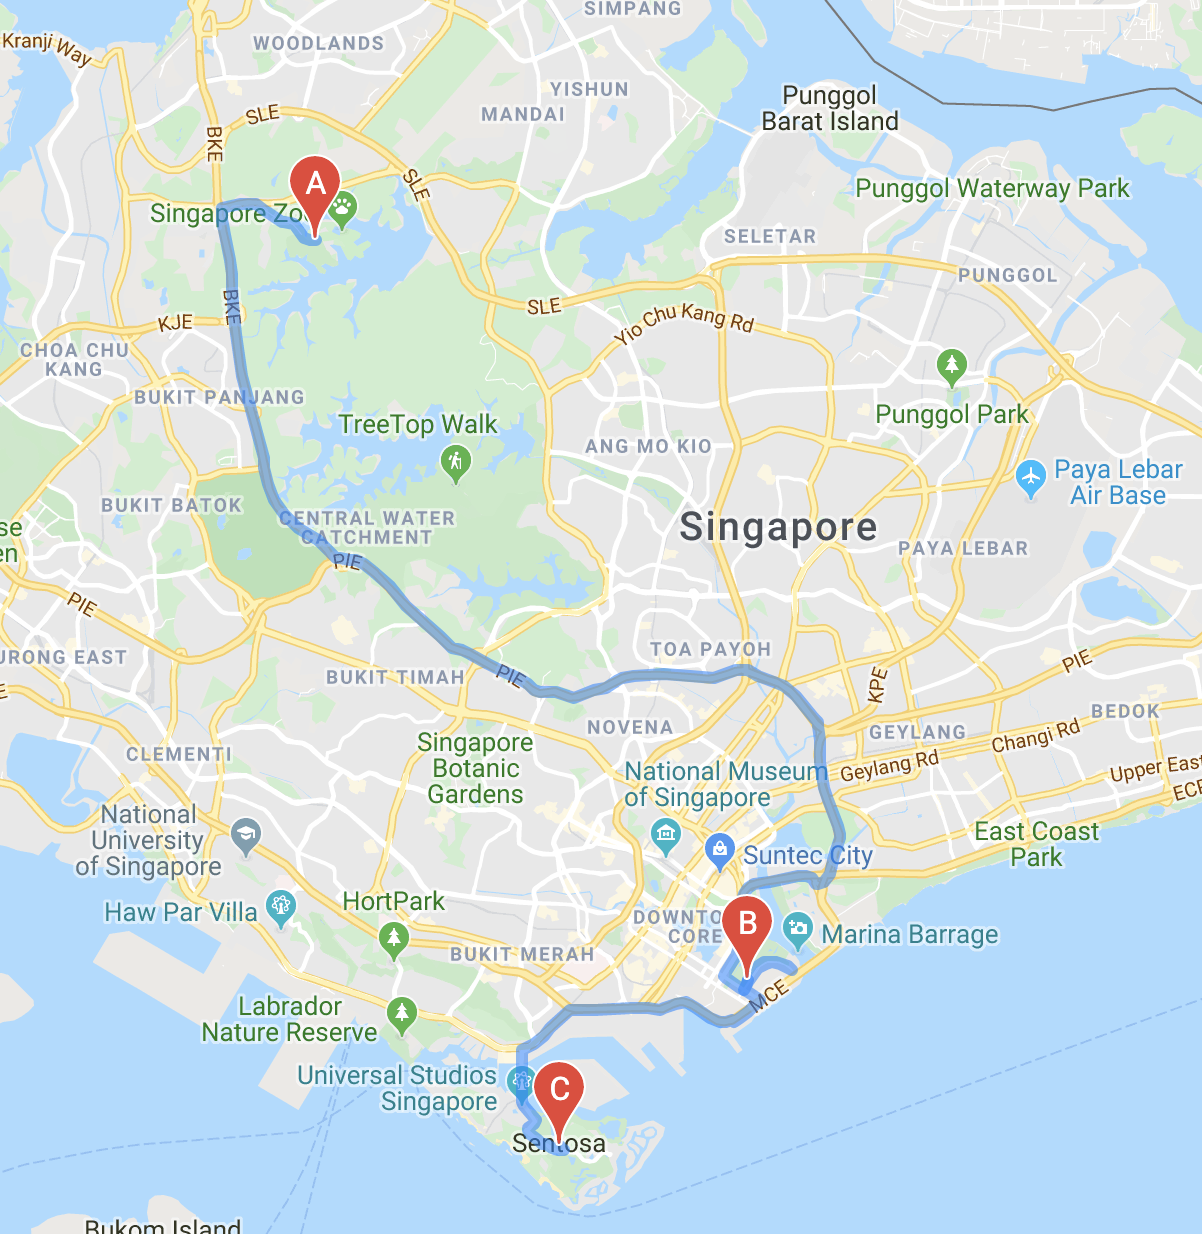
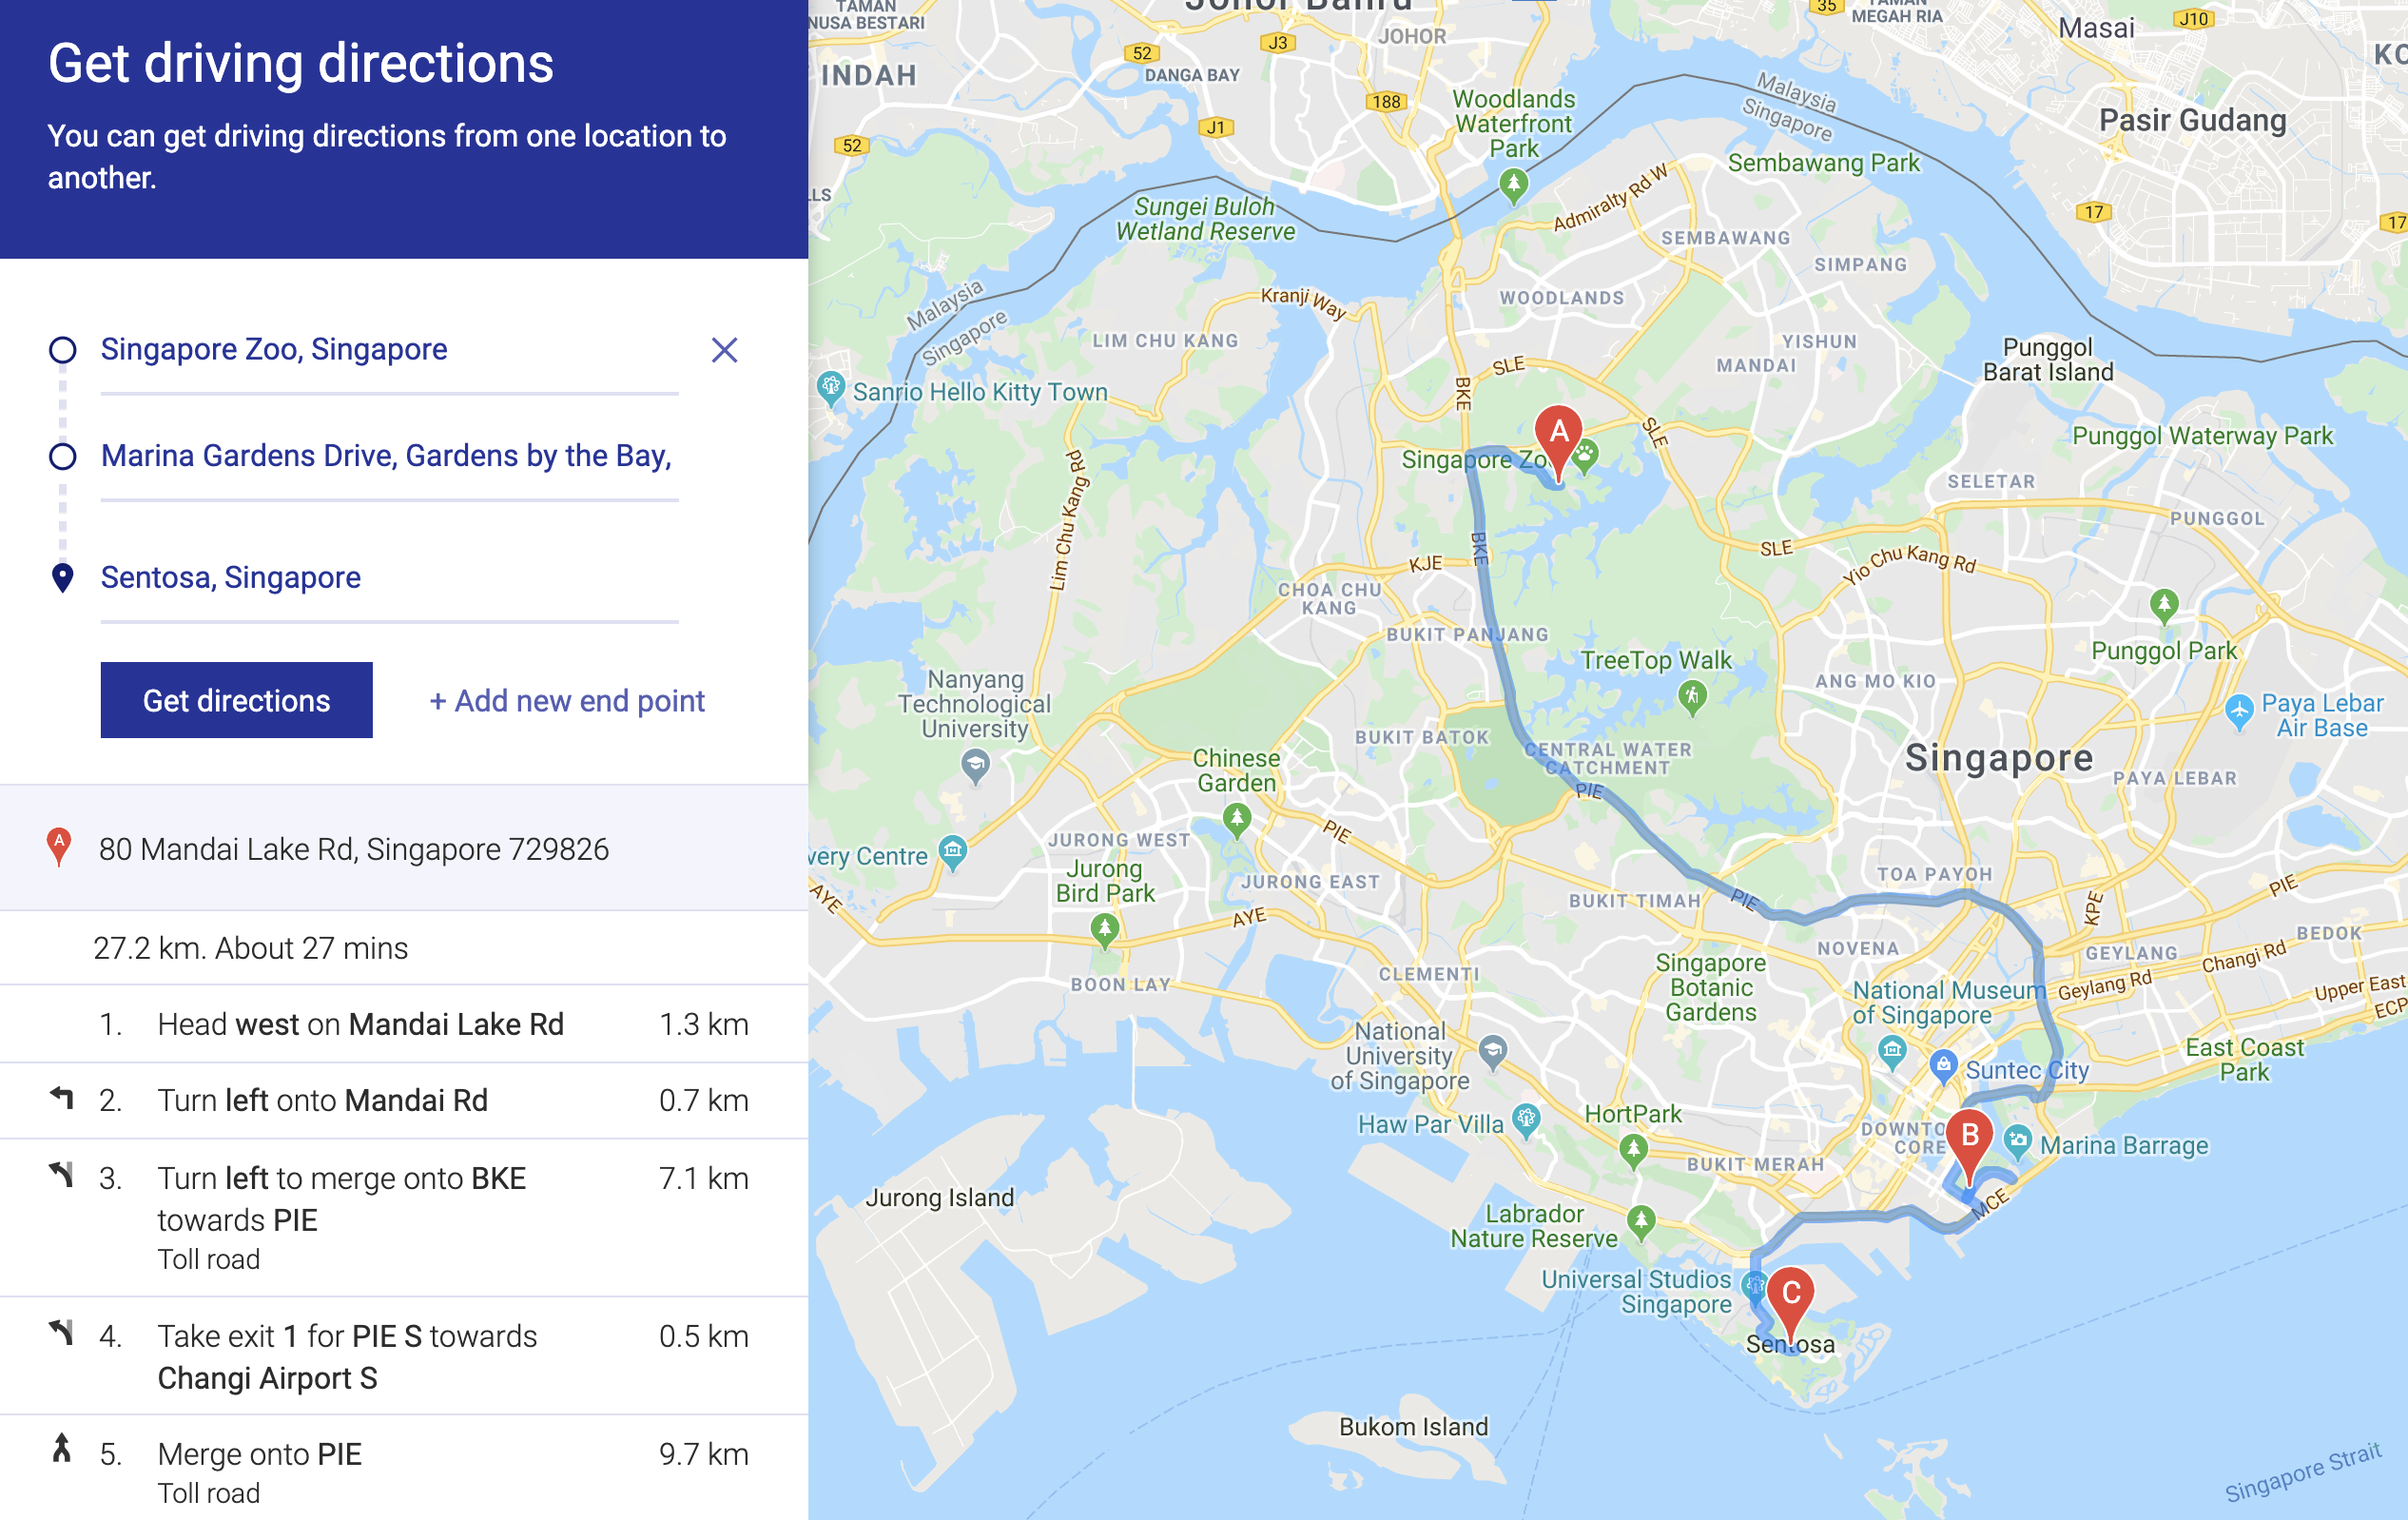
The request we need to travel to the three places I mentioned is:

const request = {
  origin: 'The Singapore Zoo',
  destination: 'Sentosa',
  waypoints: [{
    location: 'Gardens by the bay',
    stopover: true
  }],
  travelMode: 'DRIVING'
}

// Draw the directions
getDirections(request)
  .then(/*...*/)
  .catch(/*...*/)
Three points on the map

Next, we want to add search boxes so users can search for directions with waypoints.
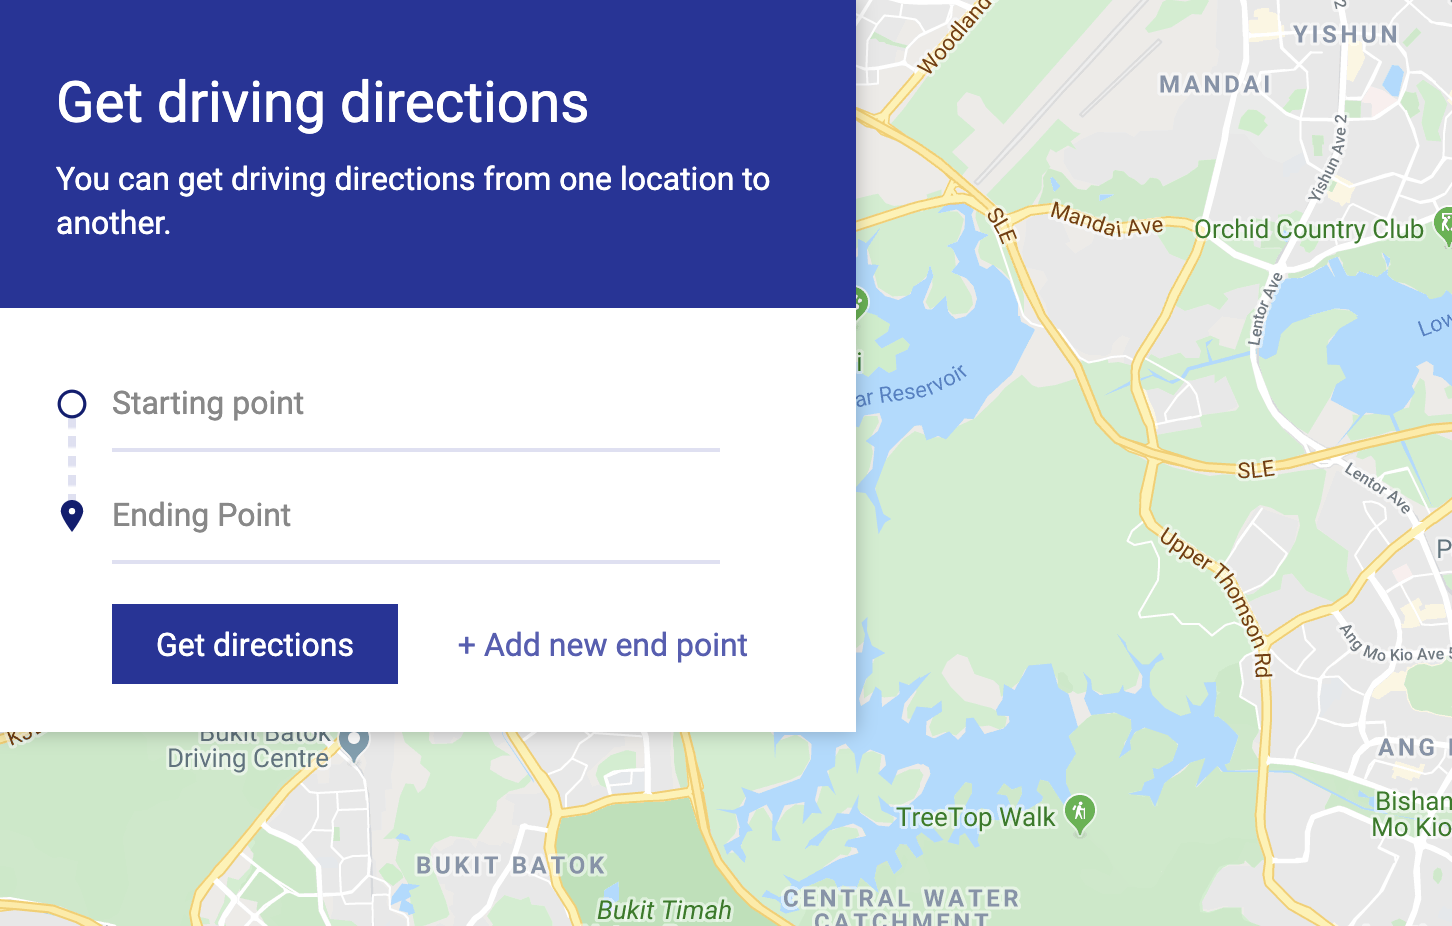
Adding search boxes

We want to let users decide whether they want to travel to more locations. To do this, we’ll add a <button> that says “Add new endpoint” in the search panel.

<div class="search-panel__body">
  <!-- ... -->
  <div class="search-panel__actions">
    <!-- ... -->
    <button type="button" class="secondary" data-js="add-searchbox">
      + Add new endpoint
    </button>
  </div>
</div>
Button for adding a new endpoint.

When a user clicks on “add new endpoint”, we want to add a search box to the search panel. To do this, we add an event listener to the “add new endpoint” button.

function initGoogleMap () {
  // ...
  const addSearchboxButton = searchPanel.querySelector('[data-js="add-searchbox"]')

  addSearchboxButton.addEventListener('click', event => {
    // ...
  })
}

One way to add a search box is to write the HTML in JavaScript. You already know how to do this from the previous components, so we’re going to do something different.

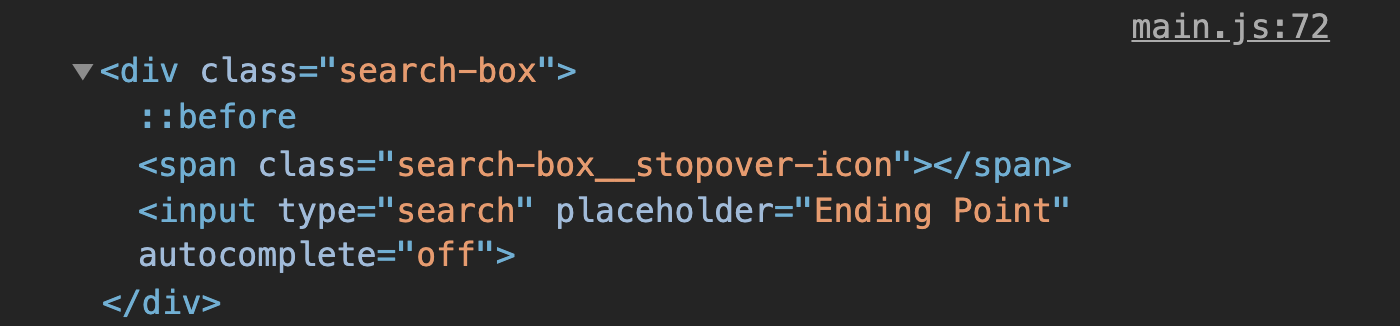
We’re going to clone a search box since there are already two of them in the HTML.

To clone an element, we first need to find the element from the HTML. We can use any search box (but we’ll use the last one because it’s more convenient).

addSearchboxButton.addEventListener('click', event => {
  const searchBoxes = [...searchPanel.querySelectorAll('.search-box')]
  const lastSearchBox = searchBoxes[searchBoxes.length - 1]
})

We can clone an element with cloneNode. If we want to clone the entire element (with its contents), we need to pass true into cloneNode.

addSearchboxButton.addEventListener('click', event => {
  // ...
  const clone = lastSearchBox.cloneNode(true)
  console.log(clone)
})

The cloned element has the same HTML as the original element.

The cloned element

We can add the cloned element into the DOM with insertAdjacentElement. insertAdjacentElement takes two arguments.

element.insertAdjacentElement(location, elementToInsert)

location can take four possible values:

  • beforebegin
  • afterbegin
  • beforeend
  • afterend
<!-- beforebegin -->
<p>
  <!-- afterbegin -->
  The quick brown fox jumps over the lazy dog
  <!-- beforeend -->
</p>
<!-- afterend -->

This is how we can use insertAdjacentElement:

addSearchboxButton.addEventListener('click', event => {
  // ...
  lastSearchBox.insertAdjacentElement('afterend', clone)
})

(If we don’t use insertAdjacentElement, we need to use insertBefore, which takes more work).

The cloned element

Resetting the value

If the user wrote some text into the last search box before clicking “Add new endpoint”, the search box we add will contain that text.

Inserted search box has the same text as the previous search box

This happens because cloneNode(true) clones everything, even the value inside the input.

We need to reset any relevant details after cloning. In this case, we only need to reset the input value.

addSearchboxButton.addEventListener('click', event => {
  // ...
  const input = clone.querySelector('input')
  input.value = ''
  // ...
})
Inserted search box is now empty.

Adding Google Autocomplete

Our new search box doesn’t trigger Google’s Autocomplete.

Search box doesn't trigger Google's Autocomplete.

It doesn’t trigger Google’s Autocomplete because we have not initialised an Autocomplete with the new search box.

Let’s fix this by initializing the Autocomplete before we put the search box into the DOM.

addSearchboxButton.addEventListener('click', event => {
  // ...
  const input = clone.querySelector('input')
  const autocomplete = new google.maps.places.Autocomplete(input)
  autocomplete.bindTo('bounds', map)

  lastSearchBox.insertAdjacentElement('afterend', clone)
})
Inserted search box triggers Google's Autocomplete widget

Maximum number of search boxes

Google Maps lets you join up to 10 locations:

  1. 1 startpoint
  2. 8 waypoints
  3. 1 endpoint

We want to limit the number of search boxes so we don’t hit the WAYPOINT LIMIT EXCEEDED error. Here, we’ll limit search boxes to 10.

To do this, we stop the user from creating extra search boxes once there are 10 search boxes in the DOM.

addSearchboxButton.addEventListener('click', event => {
  let searchBoxes = [...searchPanel.querySelectorAll('.search-box')]
  if (searchBoxes.length >= 10) return
  // ...
})

Deleting search boxes

Users may want to reduce the number of waypoints, so we need to give them a way to delete search boxes. To let them delete search boxes, we need to add a delete button to each search box.

<div class="search-box">
  <span class="search-box__stopover-icon"></span>
  <input type="search" placeholder="Starting point" />
  <button hidden type="button" class="search-box__delete-icon">
    <svg viewBox="0 0 20 20">
      <use href="images/sprite.svg#delete"></use>
    </svg>
  </button>
</div>

We have two search boxes when the page loads. One for the origin, one for the destination. These search boxes are compulsory.

We don’t want to let users delete any search boxes when there are only two search boxes left, so we’ll add a hidden attribute to the delete buttons.

<div class="search-box">
  <!-- ... -->
  <button hidden ... > ... </button>
</div>

Letting users delete search boxes

There are more than 2 search boxes once we add a search box. When this happens, we want to let users delete search boxes.

We can do this by removing the hidden attribute of all delete buttons.

Note: After adding a search box into the DOM, we have to use querySelectorAll again to get the search boxes (because the DOM has changed). querySelectorAll doesn’t update automatically.

// Adds new searchboxes
addSearchboxButton.addEventListener('click', event => {
  let searchBoxes = [...searchPanel.querySelectorAll('.search-box')]
  // ...

  // Lets users delete search box.
  searchBoxes = [...searchPanel.querySelectorAll('.search-box')]
  searchBoxes.forEach(searchBox => {
    const deleteButton = searchBox.querySelector('button')
    deleteButton.removeAttribute('hidden')
  })
})
Shows delete button when hovering over the search box.

To delete a search box, we remove the search box from the DOM. Here, we can add an event listener to the search panel. (Using the event delegation pattern).

searchPanel.addEventListener('click', event => {
  // ...
})

First, we want to check if the user clicked a delete button. If they did not click a delete button, we bail from the function.

searchPanel.addEventListener('click', event => {
  const deleteButton = event.target.closest('.search-box__delete-icon')
  if (!deleteButton) return
})

To remove the search box, we need to find the search box. We can find it with parentElement. Then, we can delete the search box with removeChild.

searchPanel.addEventListener('click', event => {
  // ...
  const searchBox = deleteButton.parentElement
  const searchBoxParent = searchBox.parentElement

  searchBoxParent.removeChild(searchBox)
})
Deletes the third search box.

Deleting Google Autocomplete predictions

Each input element comes with their own Google Autocomplete predictions. As you can see in this GIF below, when you add a search box, the number of .pac-container increases by one.

Google Autocomplete creates a .pac-container div when you initialize the Autocomplete.
  • The first .pac-container is for the first search box
  • The second .pac-container is for the second search box
  • And so on

We can remove the .pac-container if we know the index of the search box.

searchPanel.addEventListener('click', event => {
  // ...
  const searchBox = deleteButton.parentElement
  const searchBoxParent = searchBox.parentElement
  const searchBoxes = [...searchPanel.querySelectorAll('.search-box')]
  const index = searchBoxes.findIndex(sb => sb === searchBox)
  const googleAutocomplete = document.querySelectorAll('.pac-container')[index]

  searchBoxParent.removeChild(searchBox)
  document.body.removeChild(googleAutocomplete)
  // ...
})
Deletes the Google autocomplete that's bound to the search box.

Correcting placeholders

If you delete the first search box, you’ll end up with two endpoints. This isn’t ideal.

Two search boxes with 'Ending Point' placeholders.

We always want the first search box to be “Starting Point”. And the last search box to be “Ending Point”. Here we have to use querySelectorAll to get the search boxes again since the DOM was changed.

searchBoxes = [...searchPanel.querySelectorAll('.search-box')]
searchBoxes[0].querySelector('input').placeholder = 'Starting point'
First search box always says 'Starting Poing'.

If you want to, try making the middle search boxes say “Waypoints” as an exercise.

Ensuring there are two search boxes.

We need to have two search boxes for the Google Maps clone. We don’t want to let users delete search boxes if there are only two in the search panel.

We’ll hide the delete buttons if there are only two search boxes left.

searchPanel.addEventListener('click', event => {
  // ...
  if (searchBoxes.length <= 2) {
    searchBoxes.forEach(searchBox => {
      const deleteButton = searchBox.querySelector('button')
      deleteButton.setAttribute('hidden', true)
    })
  }
})

Drawing the route

The UI work is done. What’s left is to:

  1. Get information from the search panel
  2. Change the information to what Google’s Directions Service needs
  3. Send the request

Here, we need to get the address from each search box. We’ll first get all the search boxes.

searchPanel.addEventListener('submit', event => {
  event.preventDefault()
  const searchBoxes = [...searchPanel.querySelectorAll('.search-box')]
})

We know this:

  1. The first search box is the origin
  2. The last search box is the destination

We can create a request object from these two search boxes first.

searchPanel.addEventListener('submit', event => {
  // ...
  const request = {
    origin: searchBoxes[0].querySelector('input').value.trim(),
    destination: searchBoxes[searchBoxes.length - 1].querySelector('input').value.trim(),
    travelMode: 'DRIVING'
  }
})

If there are more than two search boxes, we know there are waypoints. We need to add a waypoints property into the request object.

searchPanel.addEventListener('submit', event => {
  // ...
  if (searchBoxes.length > 2) {
    // Add waypoints property to request object
  }
})

Here we know the search boxes in the middle are all waypoints. We can use slice to grab these search boxes.

searchPanel.addEventListener('submit', event => {
  // ...
  if (searchBoxes.length > 2) {
    const waypoints = searchBoxes.slice(1, searchBoxes.length - 1)
  }
})

We need to change each waypoint to be an object with two properties: location and stopover. We can use map to construct the object.

searchPanel.addEventListener('submit', event => {
  // ...
  if (searchBoxes.length > 2) {
    const waypoints = searchBoxes.slice(1, searchBoxes.length - 1)
      .map(waypoint => {
        return {
          location: waypoint.querySelector('input').value.trim(),
          stopover: true
        }
      })
  }
})

Then, we add waypoints to the request object.

searchPanel.addEventListener('submit', event => {
  // ...
  if (searchBoxes.length > 2) {
    // ...
    request.waypoints = waypoints
  }
})

After creating the waypoints, we’ll draw directions.

searchPanel.addEventListener('submit', event => {
  // ...
  getDirections(request)
    .then(/*...*/)
    .catch(/*...*/)
})
Directions drawn.

That’s it!