🛠️ Popover: Making four popovers

Hey ,

I'm thrilled to help you learn JavaScript. Unfortunately, you've landed on a page where you cannot access with your current purchase.

Please upgrade (use this link) access this content.

I'm super eager to help you learn more!

🛠️ Popover: Making four popovers

Popovers can pop out in many different directions. We’re going to make popovers in each of these directions for practice:

  1. Top
  2. Left
  3. Right
  4. Bottom
Four popovers.

We’ll make the left popover first.

Making the left popover

First, we need to add the trigger and popover into the HTML:

<!-- Popover trigger -->
<button class="popover-trigger" data-popover-position="left">
  <svg viewBox="0 0 40 20">
    <use xlink:href="#arrow"></use>
  </svg>
</button>
<!-- Popover HTML -->
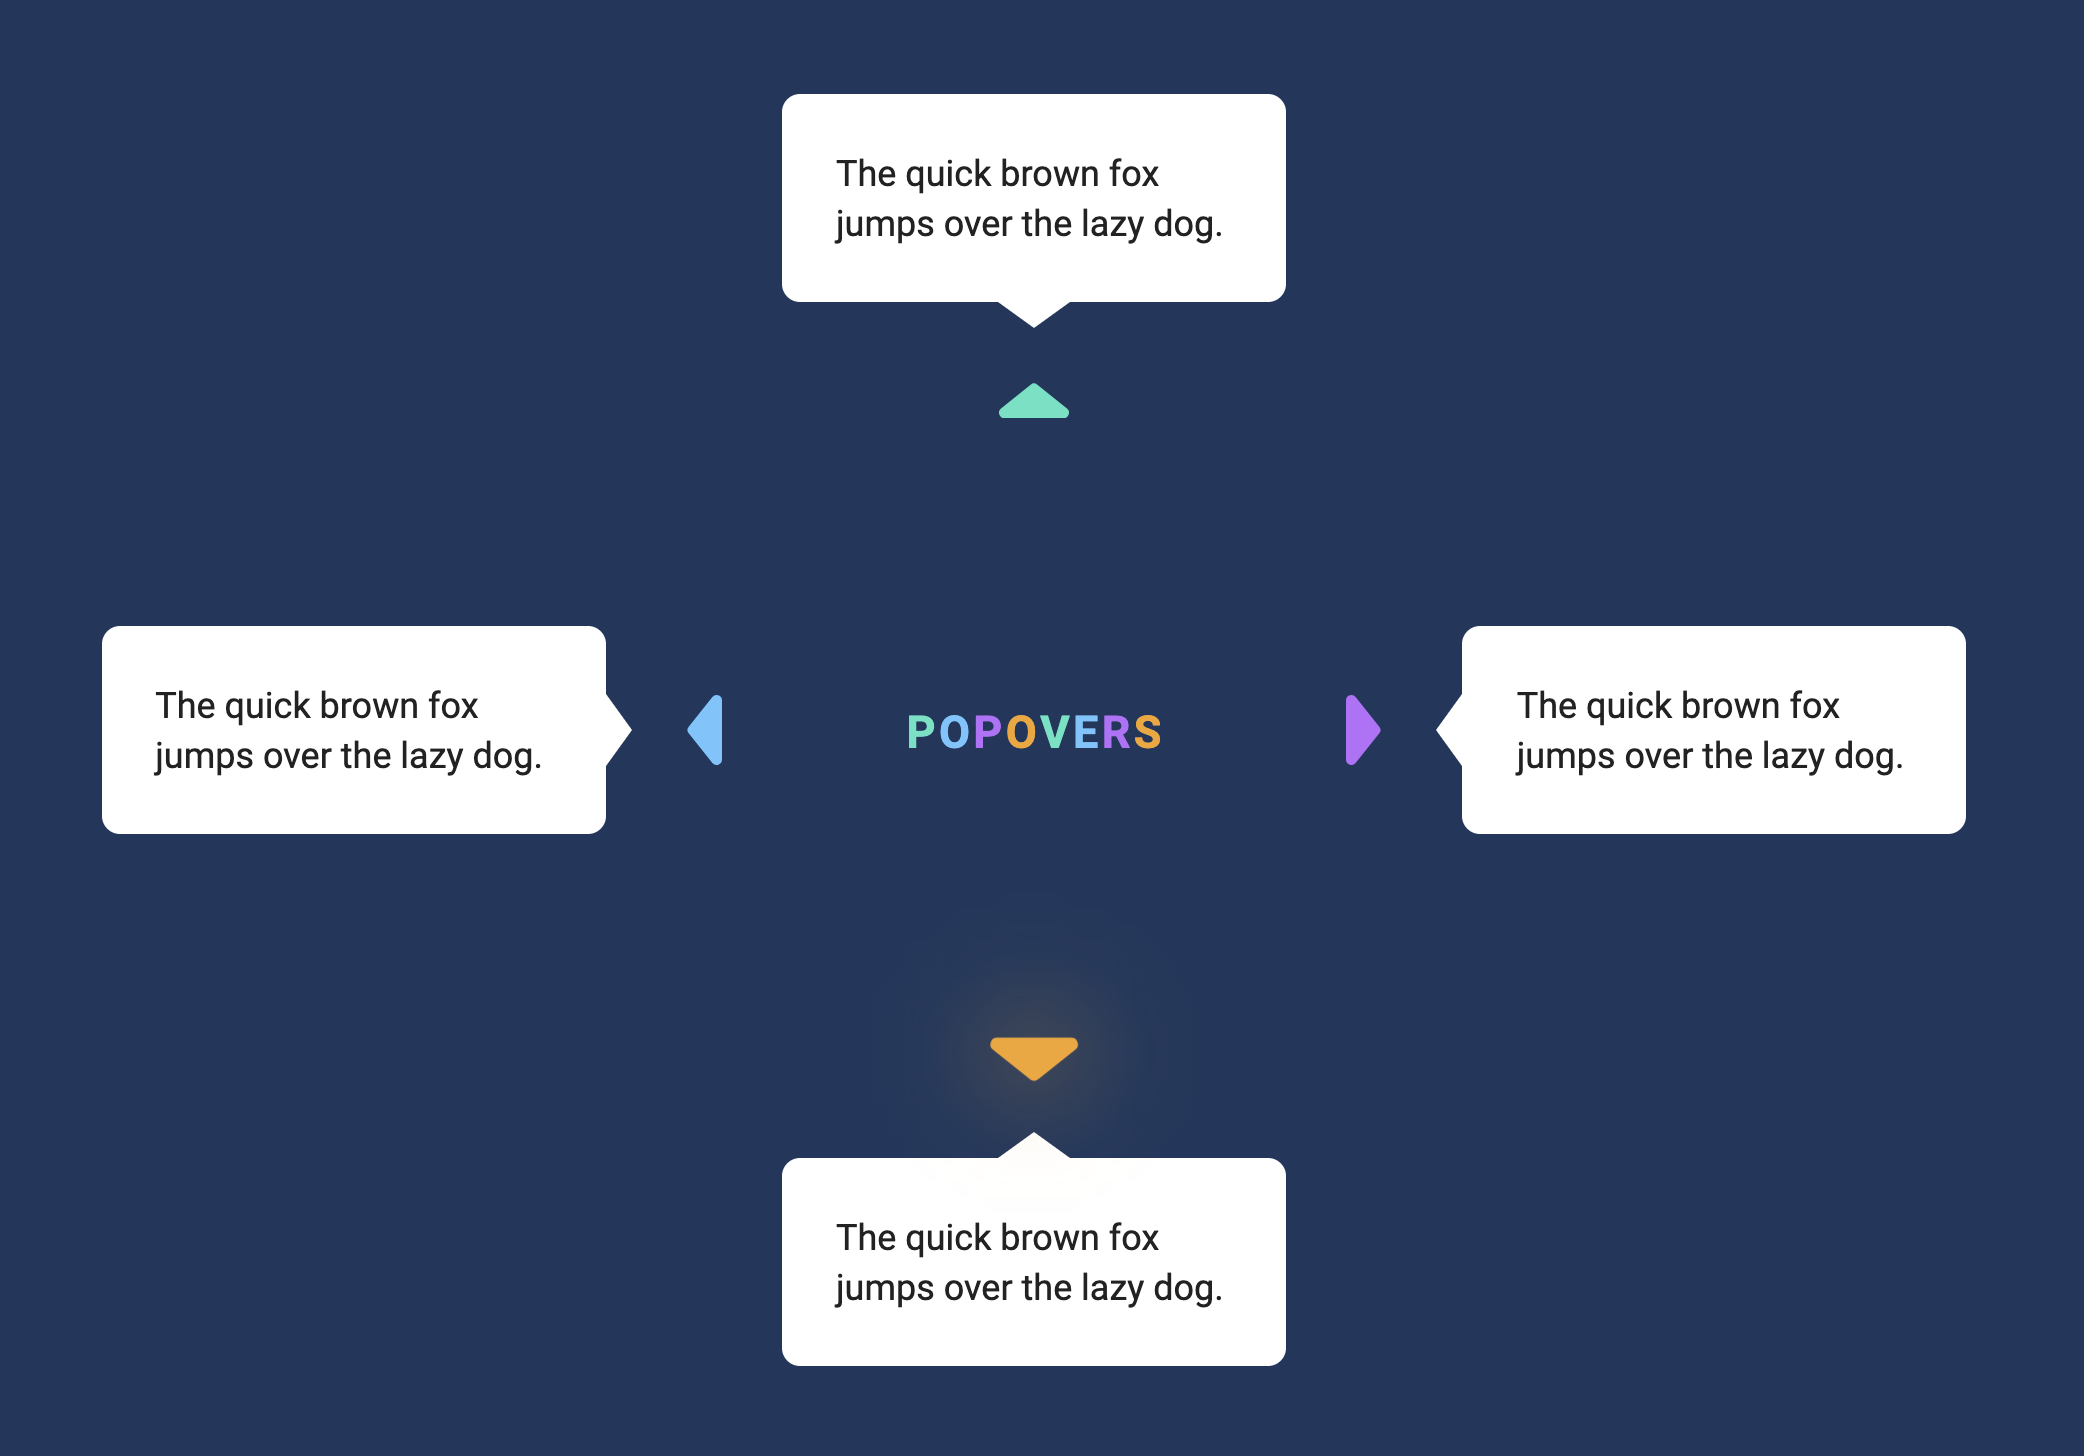
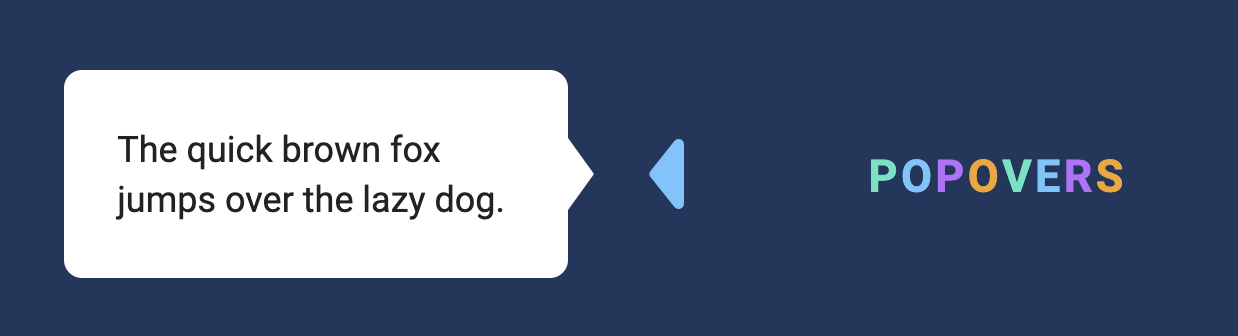
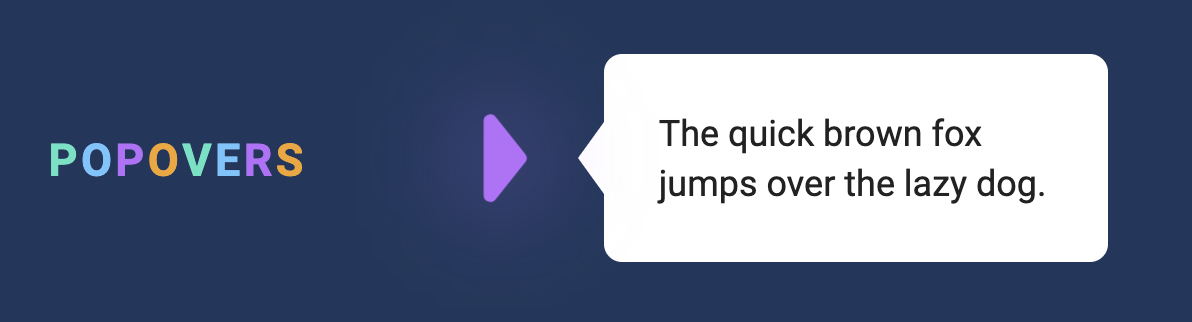
<div class="popover" data-position="left">
  <p>The quick brown fox jumps over the lazy dog.</p>
</div>

Code for the left popover is similar to the top popover. It can be hard to write the left popover’s code if we need to avoid variable name collisions with the top popover. The best way to overcome this is to isolate the top popover’s code.

We can isolate the top popover’s code with a block scope.

{
  // Top popover code
}

Next, we need to select the left popover’s trigger. We can’t just look for .popover-trigger anymore. We need a more specific selector.

Since the left popover is the second popover, one thing we can do is use querySelectorAll.

const popoverTrigger = document.querySelectorAll('.popover-trigger')[1]

Then, we need to select the second popover.

const popover = document.querySelectorAll('.popover')[1]

To get the popover’s left value, we need to know the trigger’s left value.

Finding the trigger's left value.
const popoverTriggerRect = popoverTrigger.getBoundingClientRect()
const triggerLeft = popoverTriggerRect.left

The trigger’s left value is a sum of the popover’s left, the popover’s width, and some breathing space.

Finding the popover's left value.
const space = 20
const popoverRect = popover.getBoundingClientRect()
const leftPosition = triggerLeft - popoverRect.width - space

Then we set the left position with style.

popover.style.left = `${leftPosition}px`
Set the left position of the left popover.

Next, we need to calculate the left popover’s top position.

To calculate the top position, we need to know the center of the trigger.

Vertical center of the trigger.
const triggerCenter = (popoverTriggerRect.top + popoverTriggerRect.bottom) / 2

We know the center of the popover is sum of the the popover’s top position and half of its height.

Vertical center of the popover.
const topPosition = triggerCenter - popoverRect.height / 2

Then we’ll set the top position

popover.style.top = `${topPosition}px`
Setting the left popover's top.

We need to hide the popover after positioning it.

// Hides popover once it is positioned
popover.setAttribute('hidden', true)

We also have to add event listeners to the left popover and its trigger.

// Allows users to show/hide the popover
popoverTrigger.addEventListener('click', _ => {
  if (popover.hasAttribute('hidden')) {
    popover.removeAttribute('hidden')
  } else {
    popover.setAttribute('hidden', true)
  }
})

// Hides popover if user clicks outside of the trigger and the popover
document.addEventListener('click', event => {
  if (event.target.closest('.popover') || event.target.closest('.popover-trigger')) return
  popover.setAttribute('hidden', true)
})

Refactor

Code for the top and left popover are similar. It makes sense to refactor at this point, especially since we still need right and bottom popovers.

First, we need to be able to select all four triggers individually. We can do this with a forEach loop.

const popoverTriggers = document.querySelectorAll('.popover-trigger')

popoverTriggers.forEach(popoverTrigger => {
  // ...
})

Next, we need to find the popover the trigger links to. The best way to do this is give an id to each popover.

We can add a custom attribute to the trigger that points to this id. We’ll call this attribute data-target.
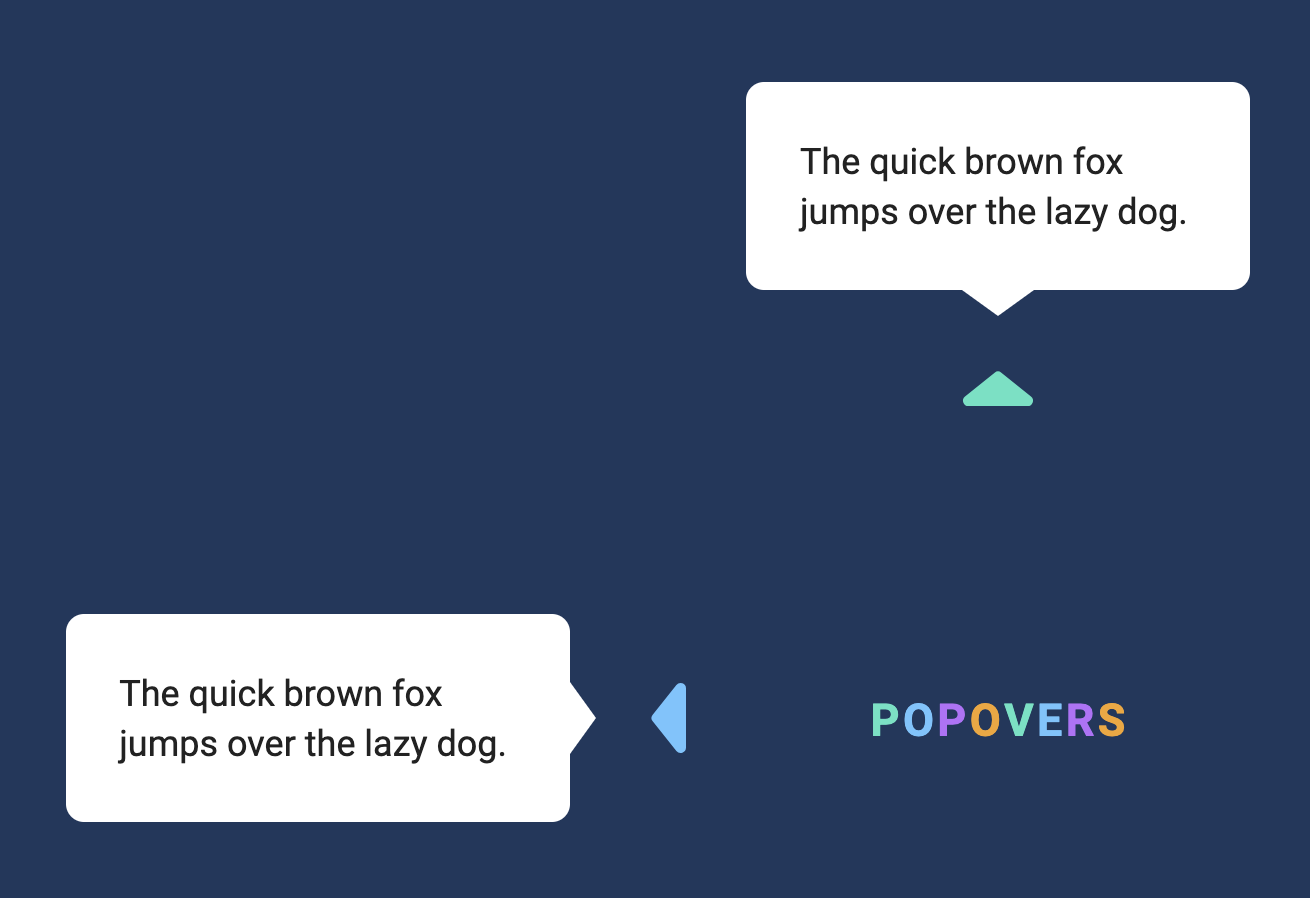
<!-- Popovers -->
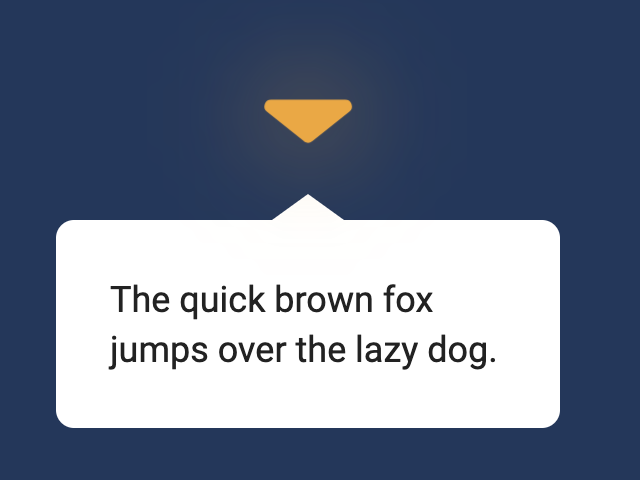
<div id="pop-1" class="popover" data-position="top">
  <p>The quick brown fox jumps over the lazy dog.</p>
</div>

<div id="pop-2" class="popover" data-position="left">
  <p>The quick brown fox jumps over the lazy dog.</p>
</div>
<!-- Triggers -->
<button class="popover-trigger" data-trigger="pop-1" ... > ... </button>
<button class="popover-trigger" data-trigger="pop-2" ... > ... </button>

We can find the popover with the id attribute.

popoverTriggers.forEach(popoverTrigger => {
  const popover = document.querySelector(`#${popoverTrigger.dataset.target}`)
  // ...
})

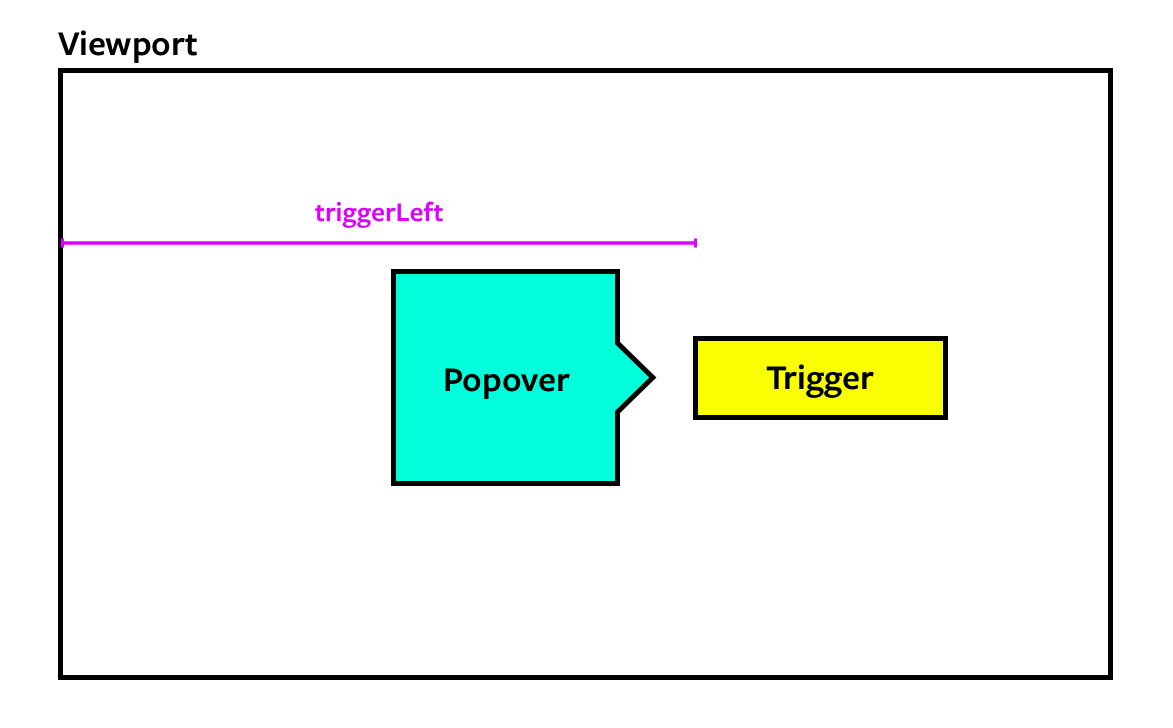
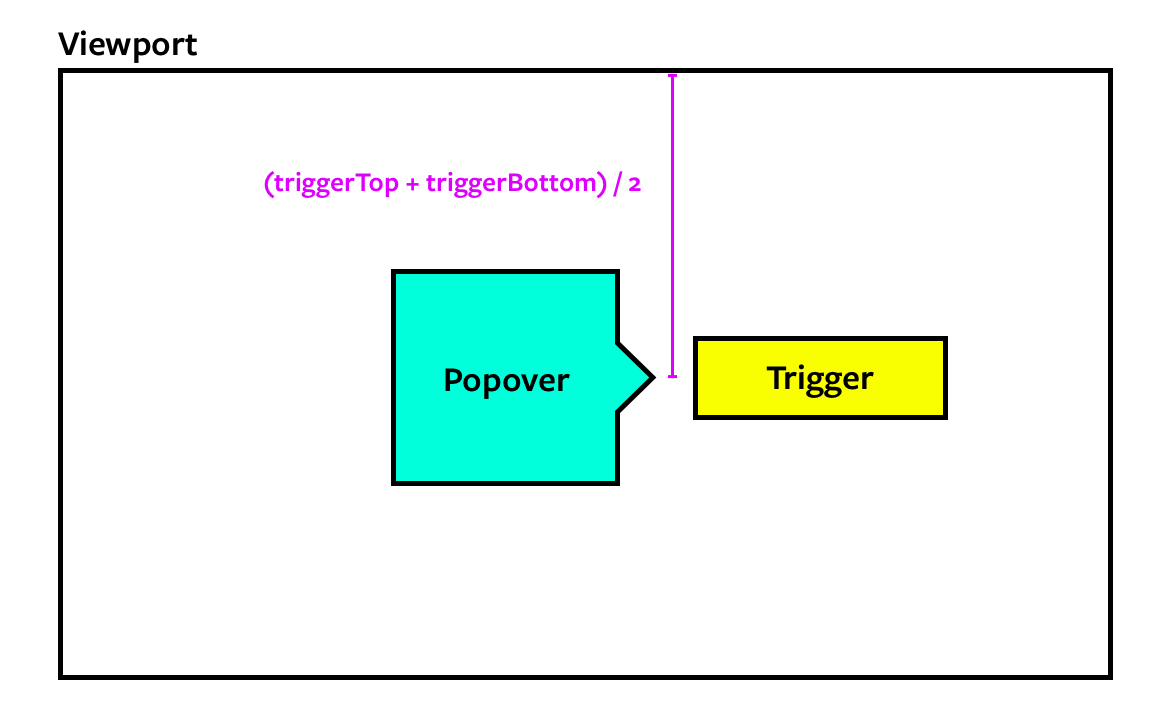
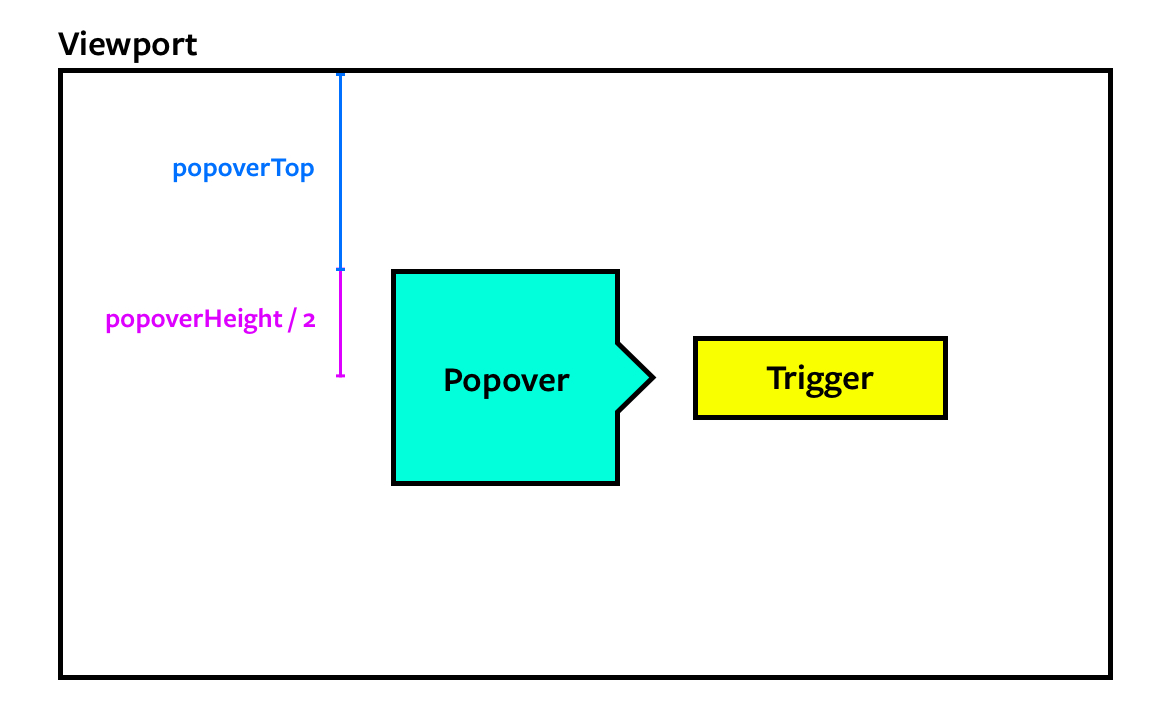
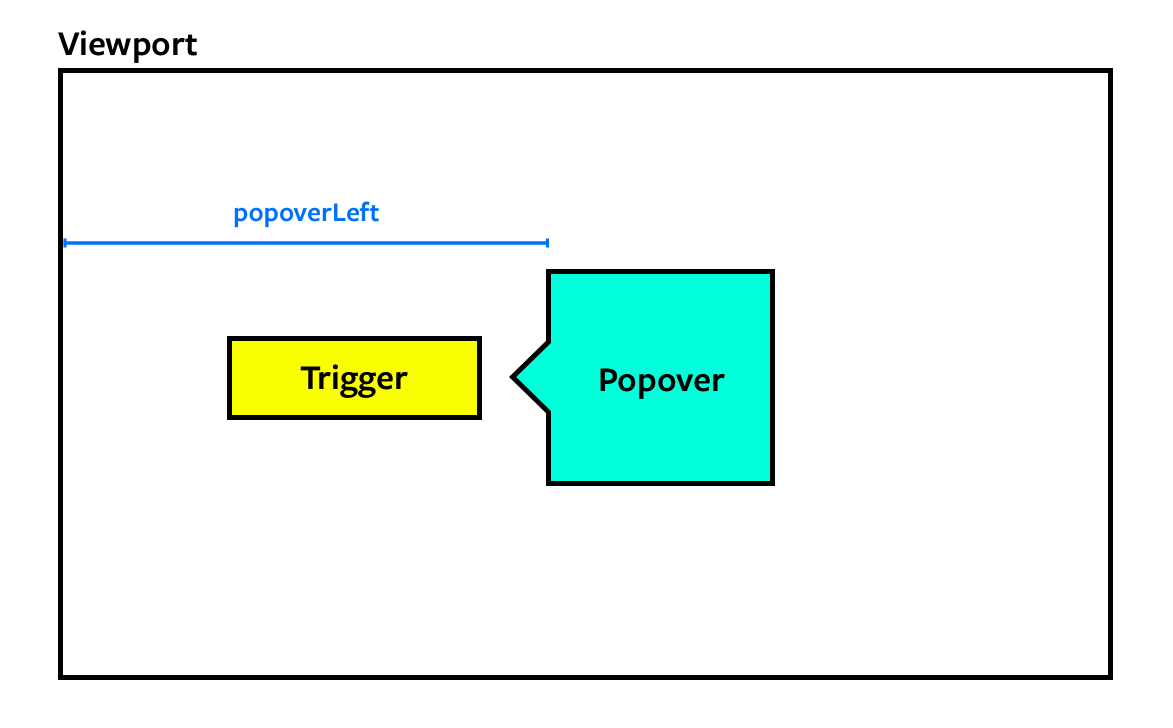
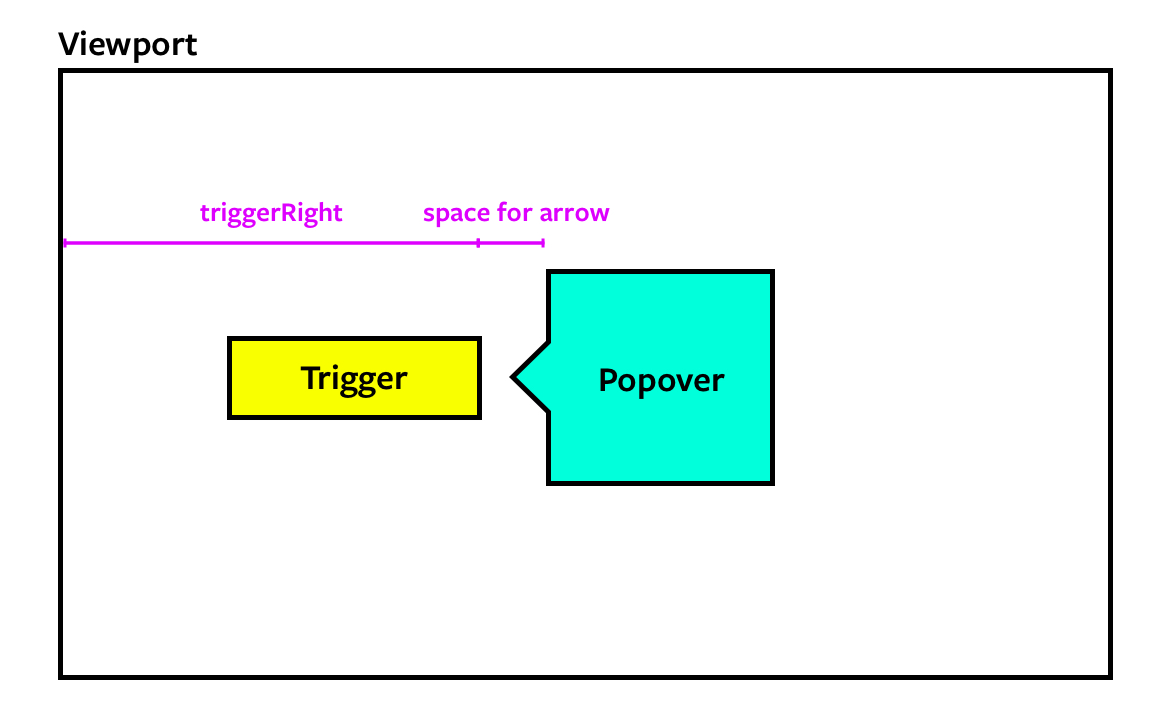
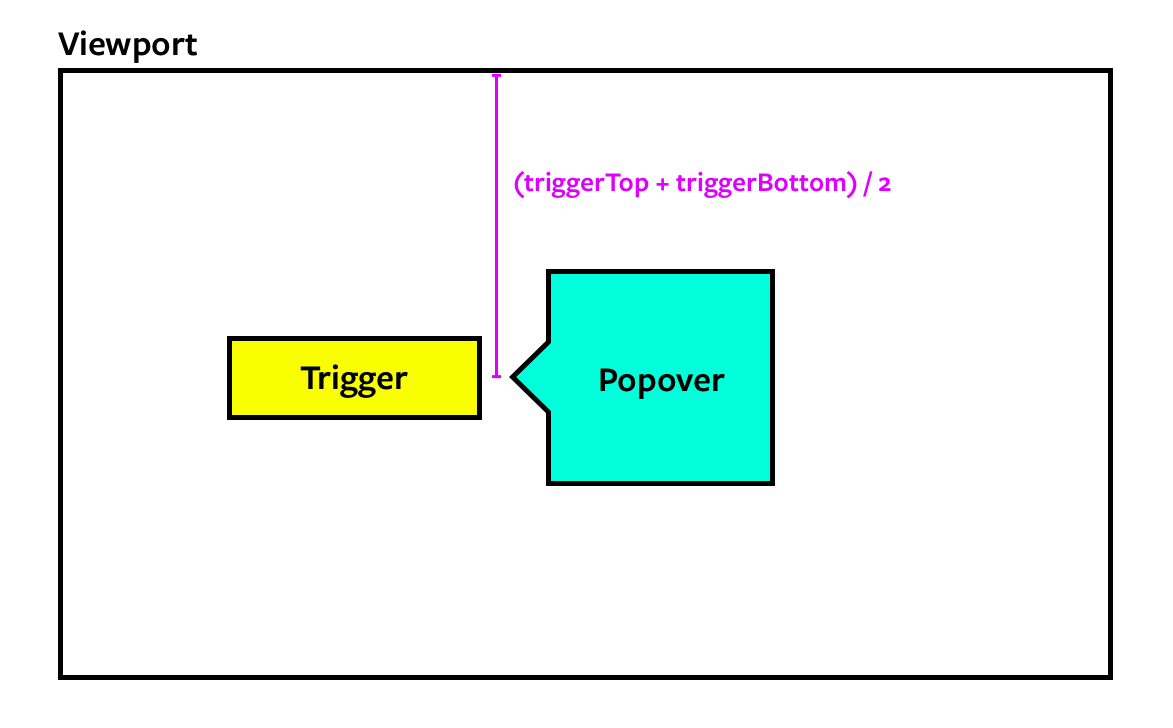
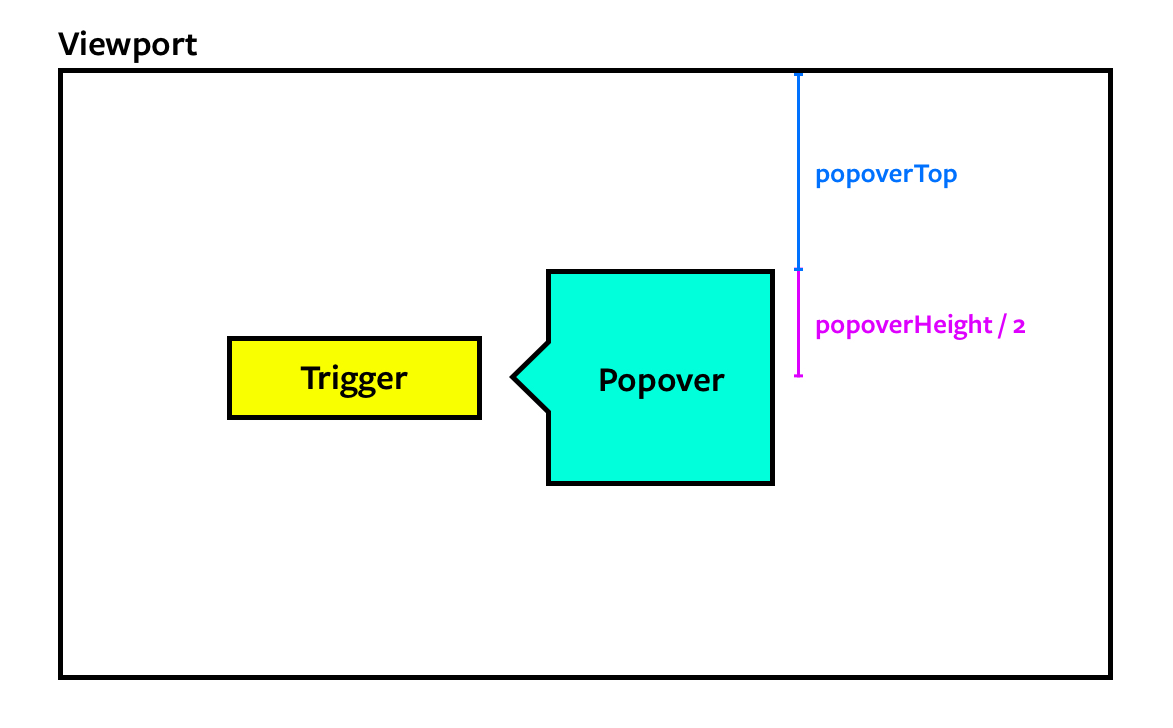
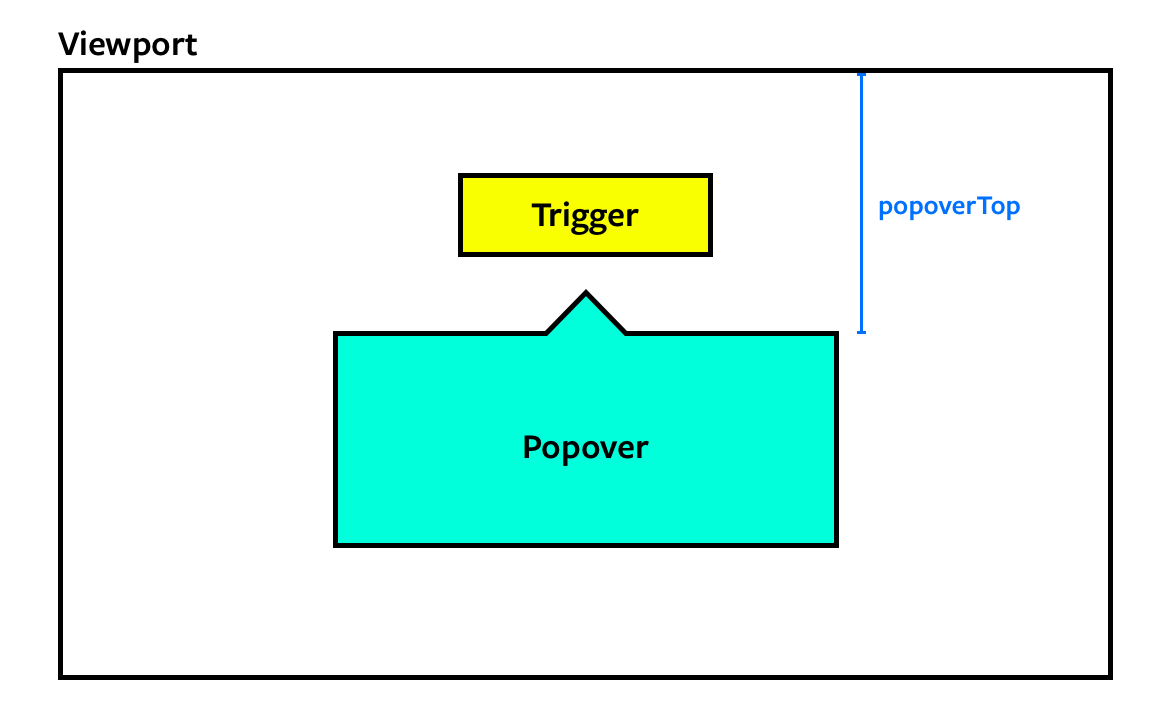
Next, we need to calculate each popover’s top and left position. We can leave the calculation to a dedicated function. We’ll call this function calculatePopoverPosition.

const calculatePopoverPosition = _ => {
  // ...
}

We need to know three things to calculate the popover’s top and left position:

  1. The trigger’s bounding rectangle
  2. The popover’s bounding rectangle
  3. The amount of breathing space

We can get (1) and (2) by passing the trigger and popover into the function. We can get (3) by declaring it directly in calculatePopoverPosition.

const calculatePopoverPosition = _ => {
  const popoverTriggerRect = popoverTrigger.getBoundingClientRect()
  const popoverRect = popover.getBoundingClientRect()
}

One function should only do one thing. This means calculatePopoverPosition should only calculate the top and left values for each popover. It should not set them.

For this to work, we’ll return an object that contains the top and left values.

const calculatePopoverPosition = (popoverTrigger, popover) => {
  // ...
  return {
    top: 'some-value',
    left: 'some-value'
  }
}

We need to know where to position the popover (top, right, bottom, or left). We can get this information from the data-position custom

const calculatePopoverPosition = (popoverTrigger, popover) => {
  // ...
  const { position } = popover.dataset

  return {
    top: 'some-value',
    left: 'some-value'
  }
}

If position is top, we’ll use the top popover’s calculation.

const calculatePopoverPosition = (popoverTrigger, popover) => {
  // ...
  if (position === 'top') {
    return {
      top: popoverTriggerRect.top - popoverRect.height - space,
      left: (popoverTriggerRect.left + popoverTriggerRect.right) / 2 - popoverRect.width / 2
    }
  }
  // ...
}

If the position is left, we’ll use the left popover’s calculation.

const calculatePopoverPosition = (popoverTrigger, popover) => {
  // ...
  if (position === 'left') {
    return {
      left: popoverTriggerRect.left - popoverRect.width - space,
      top: (popoverTriggerRect.top + popoverTriggerRect.bottom) / 2 - popoverRect.height / 2
    }
  }
  // ...
}

Next, we will set the popover’s top and left values.

popoverTriggers.forEach(popoverTrigger => {
  // ...
  const popoverPosition = calculatePopoverPosition(popoverTrigger, popover)

  popover.style.top = `${popoverPosition.top}px`
  popover.style.left = `${popoverPosition.left}px`
})
Set positions for top and left popover.

Then we will hide the popover.

popoverTriggers.forEach(popoverTrigger => {
  // ...
  popover.setAttribute('hidden', true)
})

The event listeners

We wrote two event listeners. Here’s one of them:

popoverTrigger.addEventListener('click', _ => {
  if (popover.hasAttribute('hidden')) {
    popover.removeAttribute('hidden')
  } else {
    popover.setAttribute('hidden', true)
  }
})

We can continue to write one event listener for each trigger, but that’s inefficient. We can use event delegation instead.

To use event delegation, we need add an event listener to the common ancestor of all triggers. Since triggers can be placed anywhere, the common ancestor is the document.

document.addEventListener('click', event => {
  // ...
})

If a trigger got clicked, we need to find that trigger.

document.addEventListener('click', event => {
  const popoverTrigger = event.target.closest('.popover-trigger')
  if (!popoverTrigger) return
})

Next, we need to check whether the corresponding popover is shown or hidden. We can tell by checking the hidden attribute.

  • If there’s a hidden attribute, we know popover is hidden. We show it by removing the hidden attribute.
  • If there’s no hidden attribute, we know the popover is shown. We hide it by adding the hidden attribute.
document.addEventListener('click', event => {
  // ...
  const popover = document.querySelector(`#${popoverTrigger.dataset.target}`)
  if (popover.hasAttribute('hidden')) {
      popover.removeAttribute('hidden')
    } else {
      popover.setAttribute('hidden', true)
    }

})
Show and hide the top and left popovers.

Here’s the second event listener we wrote. This event listener hides the popover if the user clicks something other than the popover and the trigger.

// Hides popover if user clicks outside of the trigger and the popover
document.addEventListener('click', event => {
  if (event.target.closest('.popover') || event.target.closest('.popover-trigger')) return
  popover.setAttribute('hidden', true)
})

There’s nothing we can do to simplify this event listener, so we’ll keep using it.

document.addEventListener('click', event => {
  // ...
  if (!event.target.closest('.popover') && !event.target.closest('.popover-trigger')) {
    const popovers = [...document.querySelectorAll('.popover')]
    popovers.forEach(popover => popover.setAttribute('hidden', true))
  }
})

The right popover

First, we need to make the right popover and it’s trigger.

<!-- Trigger -->
<button class="popover-trigger" data-target="pop-3" data-popover-position="right" >
  <svg viewBox="0 0 40 20">
    <use xlink:href="#arrow"></use>
  </svg>
</button>
<!-- Popover -->
<div id="pop-3" class="popover" data-position="right">
  <p>The quick brown fox jumps over the lazy dog.</p>
</div>

Next, we need to calculate the right popover’s left and top values.

To calculate the right popover’s left value, we need to know the trigger’s right value and the amount of space between the popover and the trigger.

Popover's left value
Popover's left value should be equal to trigger's right value plus the space
const calculatePopoverPosition = (popoverTrigger, popover) => {
  // ...
  if (position === 'right') {
    return {
      left: popoverTriggerRect.right + space,
    }
  }
}

To get the popover’s top value, we need to know the trigger’s center position. We also need the popover’s height.

This top value is the same as the left popover’s top value.

The trigger's center
The popover's center
const calculatePopoverPosition = (popoverTrigger, popover) => {
  // ...
  if (position === 'right') {
    return {
      left: triggerRect.right + space,
      top: (popoverTriggerRect.top + popoverTriggerRect.bottom) / 2 - popoverRect.height / 2
    }
  }
}
Completed the right popover.

The bottom popover

First, we need to make the HTML for the trigger and the popover.

<!-- Trigger -->
<button class="popover-trigger" data-target="pop-4" data-popover-position="bottom" >
  <svg viewBox="0 0 40 20">
    <use xlink:href="#arrow"></use>
  </svg>
</button>
<!-- Popover -->
<div id="pop-4" class="popover" data-position="bottom">
  <p>The quick brown fox jumps over the lazy dog.</p>
</div>

The left position of the bottom popover can be calculated the same way as the left position of the top popover.

const calculatePopoverPosition = (popoverTrigger, popover) => {
  // ...
  if (position === 'bottom') {
    return {
      left: (popoverTriggerRect.left + popoverTriggerRect.right) / 2 - popoverRect.width / 2,
    }
  }
}

The bottom popover’s top position is the sum of the trigger’s bottom and the space.

Bottom Popover's top position.
Sum of the trigger's bottom and space values.
const calculatePopoverPosition = (popoverTrigger, popover) => {
  // ...
  if (position === 'bottom') {
    return {
      left: (popoverTriggerRect.left + popoverTriggerRect.right) / 2 - popoverRect.width / 2,
      top: popoverTriggerRect.bottom + space
    }
  }
}
Set the bottom popover's position.

That’s it!