🛠️ Tabby: Adding keyboard interaction

Hey ,

I'm thrilled to help you learn JavaScript. Unfortunately, you've landed on a page where you cannot access with your current purchase.

Please upgrade (use this link) access this content.

I'm super eager to help you learn more!

🛠️ Tabby: Adding keyboard interaction

Let’s add keyboard interactions to Tabby. You’re going to learn to do three things here:

  1. How to improve the focus
  2. How to change the default tab sequence
  3. How to switch tabs with arrow keys

Before we begin, make sure you add this code at the top of your JavaScript file. It resolves inconsistencies between browsers. Read more here.

// Resolve browser inconsistencies when clicking on buttons
document.addEventListener('click', event => {
  if (event.target.matches('button')) {
    event.target.focus()
  }
})

Improving the focus

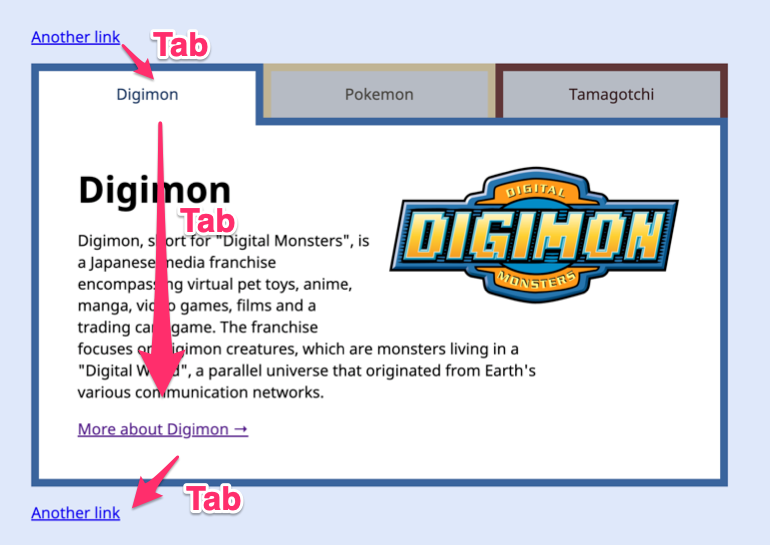
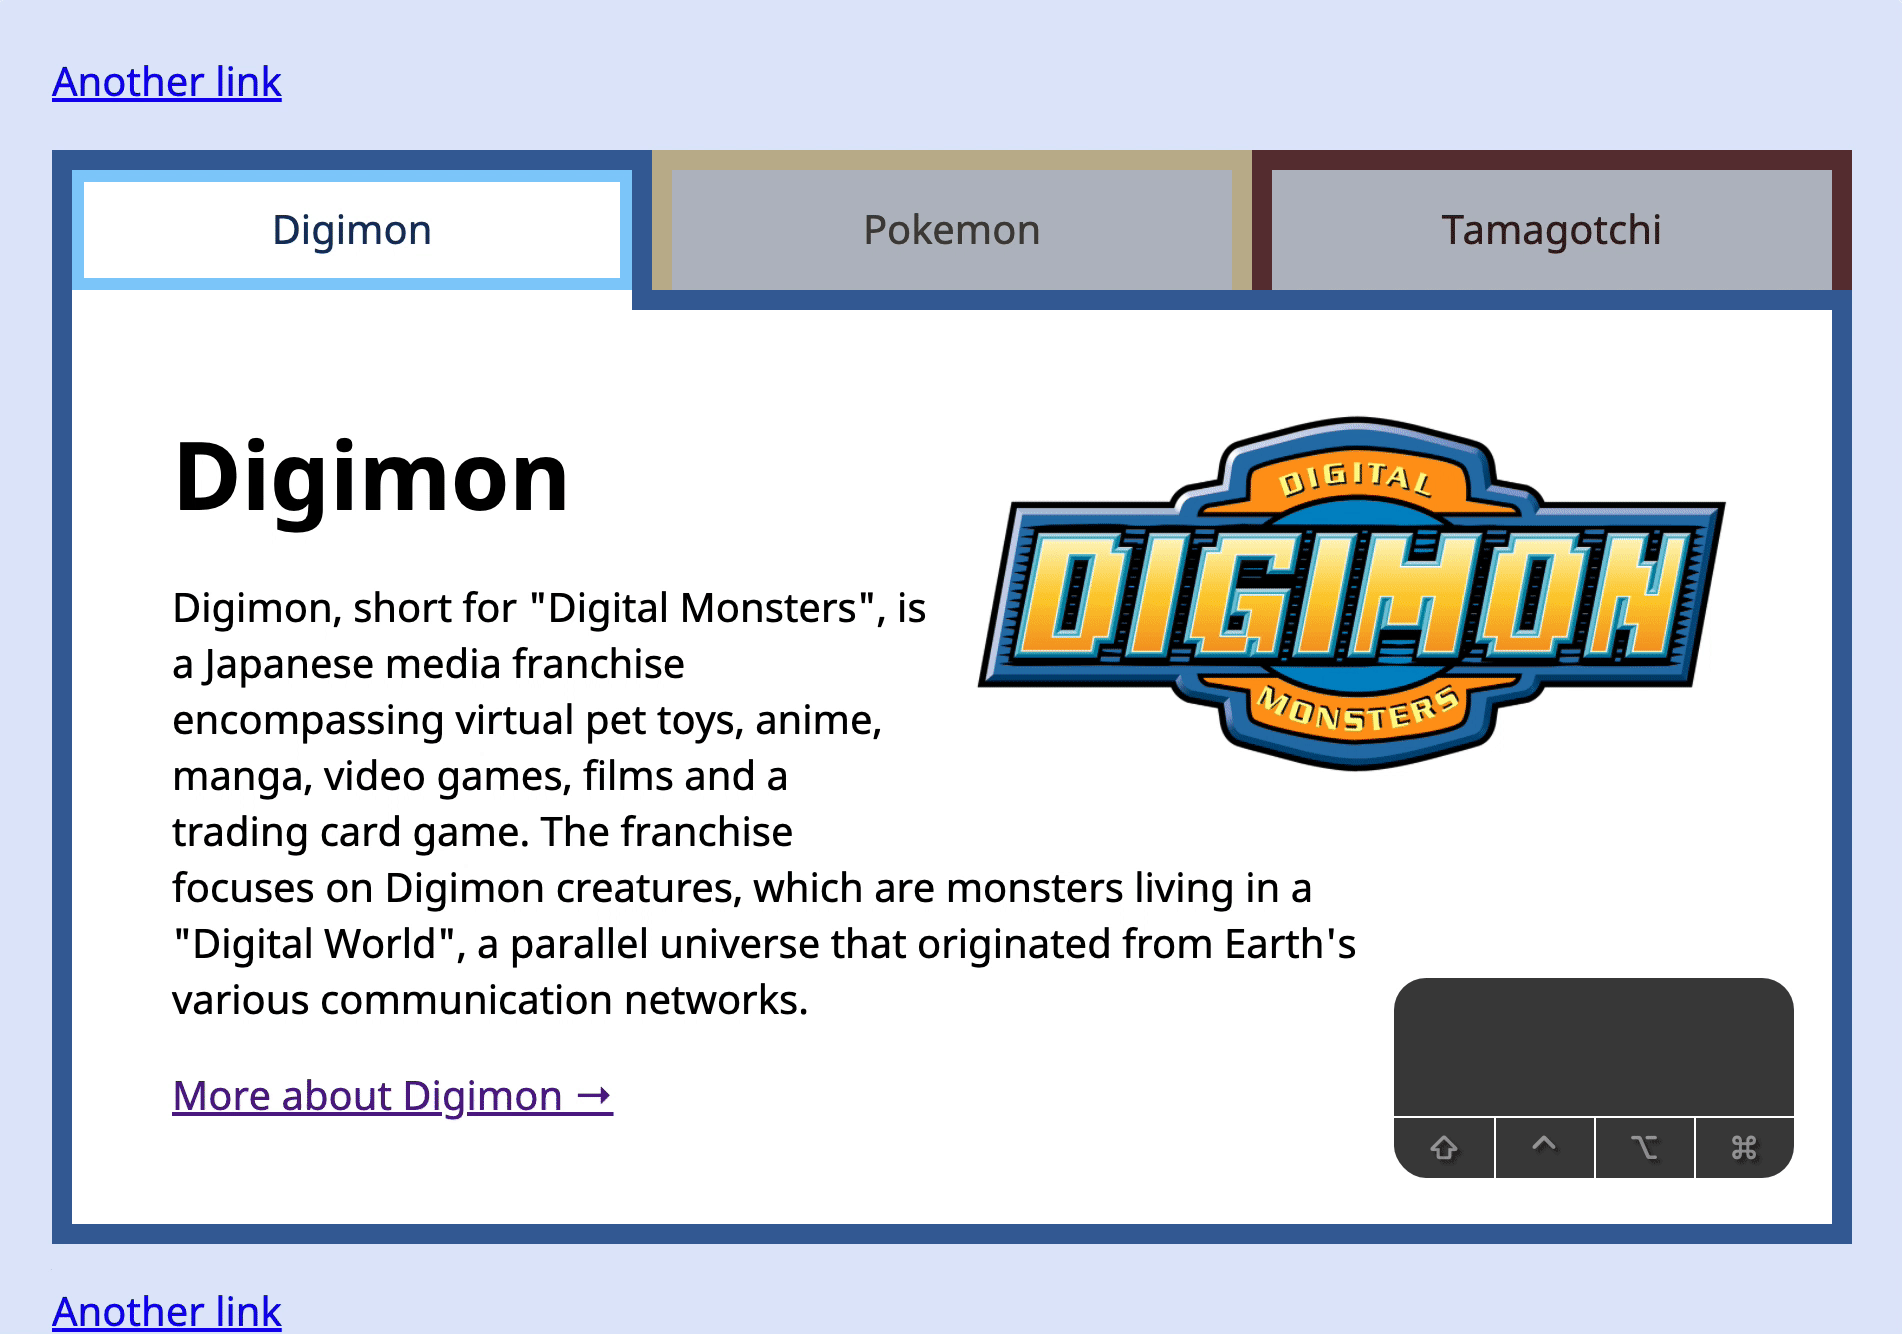
Try clicking on (or tabbing into) a .tab. Here’s what you’ll see.

Focus is not obvious.

Did you notice the focus ring?

The purpose of a focus ring is to grab attention. It makes sure the user knows where the focus is on. In this case, the focus ring doesn’t have enough contrast (especially on the Digimon Tab) to hold attention. When the default focus doesn’t generate enough contrast, you want to create your own focus style.

I wrote more about designing your own focus style in this article.

For Tabby, I chose to style focus with an inner box-shadow.

.tab:focus {
  outline: none;
  box-shadow: inset 0 0 0 6px lightskyblue;
}
Restyled focus with box-shadow.

When it comes to design, the #1 rule is consistency. We want to make sure the focus remains consistent across all focusable elements.

We can set the focus for all elements by using the universal selector (*).

*:focus {
  outline: none;
  box-shadow: inset 0 0 0 6px lightskyblue;
}
Restyled focus with box-shadow.

But with this, we have a problem. The inner box-shadow eats into text links. It makes the links less readable.

Inner box shadow eats into the links.

A better way is to set the inner box-shadow only on .tab. Here’s the CSS you need

*:focus {
  outline: none;
  box-shadow: 0 0 0 6px lightskyblue;
}

.tab:focus {
  box-shadow: inset 0 0 0 6px lightskyblue;
}
Restyled focus links.

The Tab sequence

Users use tabbed components in very specific ways. If they use the Tab key, they expect to:

  1. First Tab: To go to the selected tab
  2. Second Tab: To go to the first focusable element in tab-content
  3. Third Tab: Next focusable element (or exit the component if there are no more focusable elements)
Tab sequence.

Right now, the Tab key switches between tabs.

Current Tab sequence.

We need to prevent users from tabbing into unselected tabs. The easiest way is to use the roving tabindex method where you:

  1. Set tabindex to -1 for elements that should not be tabbed into.
  2. Remove tabindex for elements that can be tabbed into.

To do this, we first set tabindex for deselected tabs to -1.

<div class="tabs">
  <button ... class="tab is-selected">Digimon</button>
  <button ... class="tab" tabindex="-1">Pokemon</button>
  <button ... class="tab" tabindex="-1">Tamagotchi</button>
</div>

With this change, users are able to use the Tab key according to what they expect.

Corrected tab sequence.

If the user clicks the second tab, we want to make that tab available. We also want to disable the first tab. This means we:

  1. Set tabindex to -1 for other tabs
  2. Remove tabindex for the second tab
tabsList.addEventListener('click', event => {
  // ...
  // Selects a tab
  tabs.forEach(t => {
    t.classList.remove('is-selected')
    t.setAttribute('tabindex', '-1') // Disables other tabs
  })
  tab.classList.add('is-selected')
  tab.removeAttribute('tabindex') // Enables current tab
})
Enabling the second tab.

Switching Tabs

Users cannot select other tabs with the Tab key anymore, but we still need to give them a way to change tabs. For Tabbed components, we let users change tabs with Left and Right arrow keys.

  • Left arrow: Select previous tab
  • Right arrow: Select next tab

There are five steps:

  1. Listen for a keydown event.
  2. Check if users pressed the Left or Right arrow keys.
  3. If users press Right, find the next tab.
  4. If users press Left, find the previous tab.
  5. Select the tab.

First, we listen for a keydown event.

tabsList.addEventListener('keydown', event => {
  // ...
})

Second, we change tabs only if users pressed the Left or Right arrow keys.

tabsList.addEventListener('keydown', event => {
  const { key } = event
  if (key === 'ArrowLeft' || key === 'ArrowRight') {
    // Do something
  }
})

You can use the early-return pattern to improve the code right away. Here, we flip the condition. We do nothing if:

  1. Users did not press the Left arrow key,
  2. And they did not press the Right arrow key

This double-negative sounds confusing in words. But it looks alright in code.

tabsList.addEventListener('keydown', event => {
  const { key } = event
  if (key !== 'ArrowLeft' && key !== 'ArrowRight') return

  // Do something
})

Third, if users press Right, we find the next tab. Here, we need to know which tab the user is on.

  • If they are on the first tab, we look for the second tab
  • If they are on the second tab, we look for the third tab
  • If they are on the third tab, we do nothing (because the third tab is the last tab).

To find the current tab, we can use findIndex.

tabsList.addEventListener('keydown', event => {
  // ...
  const index = tabs.findIndex(t => t.classList.contains('is-selected'))
})

We know this:

  1. If index is 0, they’re on the first tab.
  2. If index is tabs.length - 1, they’re on the last tab.

If the user pressed Right, and they’re not on the last tab, we want to select the next tab. Here, we know the next tab is tabs[index + 1].

tabsList.addEventListener('keydown', event => {
  // ...
  const index = tabs.findIndex(t => t.classList.contains('is-selected'))

  if (key === 'ArrowRight' && index !== tabs.length - 1) {
    const nextTab = tabs[index + 1]
    console.log(nextTab)
  }
})

There are two ways to select the next tab:

  1. Write the code required to select the tab. This means we copy-paste (almost) everything we’ve written in the click event listener.
  2. “Click” on the tab with JavaScript (the better way).

We can “click” on a tab with the click method. Everything else will be handled by our click event listener 😊.

tabsList.addEventListener('keydown', event => {
  // ...
  const index = tabs.findIndex(t => t.classList.contains('is-selected'))

  if (key === 'ArrowRight' && index !== tabs.length - 1) {
    const nextTab = tabs[index + 1]
    nextTab.click()
  }
})
Right arrow key selects next tab.

Fourth. If the user pressed Left, and they’re not on the first tab, we want to select the previous tab. Here, we know the previous tab is tabs[index - 1].

We select the previous tab with another “click”.

tabsList.addEventListener('keydown', event => {
  // ...
  if (key === 'ArrowLeft' && index !== 0) {
    const previousTab = tabs[index - 1]
    previousTab.click()
  }
})
Switching tabs with the left and right arrow keys.

We can clean up our code a little by finding the target tab before we “click” it.

tabsList.addEventListener('keydown', event => {
  // ...
  let targetTab
  if (key === 'ArrowLeft' && index !== 0) targetTab = tabs[index - 1]
  if (key === 'ArrowRight' && index !== tabs.length - 1) targetTab = tabs[index + 1]
  if (targetTab) targetTab.click()
})

That’s it!