We are going to learn how to use a framework (like React/Vue) by building one ourselves. This approach gives you two benefits:
You get to learn how to use a framework since you understand the principles behind it.
You get to see how to use Vanilla JavaScript to build something complex, which will then bolster your confidence in JavaScript going forward
We’re going to build two things together at the same time:
The Framework
A Counter App
The Counter App
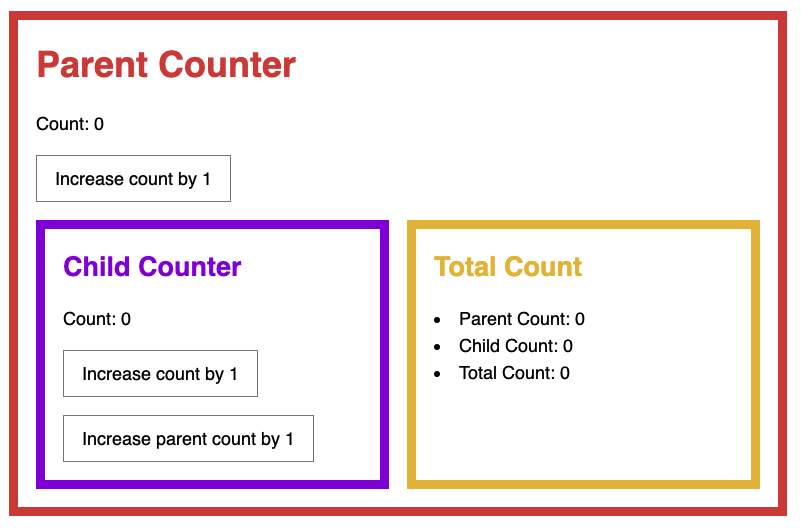
The Counter app we’re building contains three parts:
The Parent Counter
The Child Counter
The Total Count
It looks like this:
This app doesn’t make sense for a normal user, but it’s perfect for illustrating what goes behind a framework.
You can find the HTML and CSS for the Counter App in the Starter files.
The Setup
We’re going to call the framework “Tiny” since it’s a small framework that’s not recommended for real-world usage. (You’ll understand why it’s not recommended for real-world usage as you go through the lessons).
We’ll begin by creating a tiny.js file. I like to put this inside a folder called Tiny so it’s separate from the Counter app we’re building.
We can then include Tiny into main.js like this:
// main.js
import Tiny from './Tiny/tiny.js'
Then we need to export Tiny from tiny.js so main.js can use it.
// tiny.js
export default function Tiny () {}
The Initial Render
The first thing a framework needs to do is to allow users to render their components onto the DOM. This means users give us the HTML and we render it into the DOM.
We need two things to do this:
The element to render into
The HTML to render
For the element, we make it easier for users by asking them to pass in a selector.
// main.js
Tiny({
  selector: 'main',
})
We can then find the selector in Tiny with document.querySelector.
// tiny.js
export default function Tiny (options) {
  const element = document.querySelector(options.selector)
}
We also want to give users the option to pass in the actual element if the element is hard to find via a simple querySelector.
We can use the same selector option by checking if the selector is a string. If selector is a string, we know we need to run document.querySelector. Otherwise, we know we’ve been given an element.
// tiny.js
export default function Tiny (options) {
  const element = typeof options.selector === 'string'
    ? document.querySelector(options.selector)
    : options.selector
}
Next we need the HTML to render.
We can pass a template property into the Tiny for the HTML.
We can then render the template by setting the element's innerHTML property.
// tiny.js
export default function Tiny (options) {
  // ...
  function _render () {
    element.innerHTML = options.template
  }

  _render()
}
Although it’s possible to pass a string as the template, we usually don’t do this. It’s better to use a method instead because a method allows users to use other properties that are declared within the component. This feature will become very useful soon.