🛠️ Todolist: Fetching tasks

Hey ,

I'm thrilled to help you learn JavaScript. Unfortunately, you've landed on a page where you cannot access with your current purchase.

Please upgrade (use this link) access this content.

I'm super eager to help you learn more!

🛠️ Todolist: Fetching tasks

We want to fetch and display tasks that are stored in the database. Here’s what you’ll get by the end of this lesson:

Tasks fetched and added to the DOM

The first step is to create a user for the Todolist API.

Creating a user

This creates an “account” for your tasks. To create a user, you send a POST request to /users.

<body>
  <!-- ... -->

  <!-- zlFetch Library -->
  <script src="https://cdn.jsdelivr.net/npm/zl-fetch"></script>
</body>
const rootendpoint = 'https://api.learnjavascript.today'

zlFetch.post(`${rootendpoint}/users`, {
  body: {
    username: 'your-username',
    password: 'your-password'
  }
})
  .then(response => console.log(response.body))
  .catch(error => console.log(error))

You should get a response that the user is created.

A response that the user is created

Note: You only need to create a user once. You can delete this code once you’ve created your user.

Fetching tasks

The Todolist API creates three tasks for you automatically. I made it this way because I want you to learn to fetch tasks first. (It’s easier to learn this way).

To fetch tasks, you need to send a GET request to /tasks. Make sure you include your username and password to authenticate yourself.

zlFetch(`${rootendpoint}/tasks`, {
  auth: {
    username: 'your-username',
    password: 'your-password'
  }
})
  .then(response => console.log(response.body))
  .catch(error => console.error(error))

You should see three tasks in your console. The three default tasks are:

  1. Learn JavaScript for 30 minutes
  2. Build a todolist
  3. Drink water
Three tasks logged into the console

We need to use username and password to authenticate ourselves for every request we make to the Todolist API. To make this easier, we can create an auth variable at the start. And we can reuse this auth variable when we need it.

const auth = {
  username: 'your-username',
  password: 'your-password'
}

Here’s how we can use the auth variable:

zlFetch(`${rootendpoint}/tasks`, { auth })
  .then(response => console.log(response.body))
  .catch(error => console.log(error))

Adding tasks to the DOM

To add tasks to the DOM, we have to:

  1. Loop through the fetched tasks
  2. For each task, make a task element
  3. Append the task element to the DOM

First, let’s loop through the fetched tasks.

zlFetch(/*...*/)
  .then(response => {
    const tasks = response.body
    tasks.forEach(task => {
      // Create Task element
      // Append task element to DOM
    })
  })

Each task has three properties. You can see it if you console.log it.

  1. id: ID of the task
  2. done: Whether the task is completed
  3. name: Name of the task
Task logged into the console

We can make the task with the name property.

zlFetch(/*...*/)
  .then(response => {
    const tasks = response.body
    tasks.forEach(task => {
      const taskElement = makeTaskElement(task.name)
    })
  })

Once the task is made, we can append it to the DOM.

zlFetch(/*...*/)
  .then(response => {
    // ...
    tasks.forEach(task => {
      const taskElement = makeTaskElement(task.name)
      taskList.appendChild(taskElement)
    })
  })

Tasks are now added to the DOM.

Tasks fetched and added to the DOM

You see the empty state because it takes time to fetch tasks from the Todolist API. We’ll fix empty state issue in a bit.

Changing the id

Each task from the database contains an id. If we use this id, we don’t need to generate one ourselves. Let’s change makeTaskElement to take in this id.

While we’re at it, let’s also accept the done property. (We’ll use it when we edit tasks in a later lesson).

const makeTaskElement = ({id, name, done}) => {
  const taskElement = document.createElement('li')
  taskElement.classList.add('task')
  taskElement.innerHTML = DOMPurify.sanitize(`
    <input type="checkbox" id="${id}" />
    <label for="${id}"> ... </label>
    <span class="task__name">${name}</span>
    <button type="button" class="task__delete-button">
      <svg viewBox="0 0 20 20"> ... </svg>
    </button>
  `)
  return taskElement
}

With this change, we can create a task element like this:

zlFetch(/*...*/)
  .then(response => {
    // ...
    tasks.forEach(task => {
      const taskElement = makeTaskElement(task)
      // ...
    })
  })

Since we changed makeTaskElement, we need to update parts of the code we used it in.

// Adding a task to the DOM
todolist.addEventListener('submit', event => {
  // ...
  const id = generateUniqueString(10)
  const taskElement = makeTaskElement({
    id,
    name: inputValue,
    done: false
  })
  // ...
})

Fixing the empty-state flash

Right now, the Todolist flashes an empty state for a bit before populating the DOM with tasks. This can create confusion for users if they knew they’ve created some tasks.

Tasks fetched and added to the DOM

We want to find a way to tell users we’re fetching their tasks from the database. The simplest way is to change empty state message.

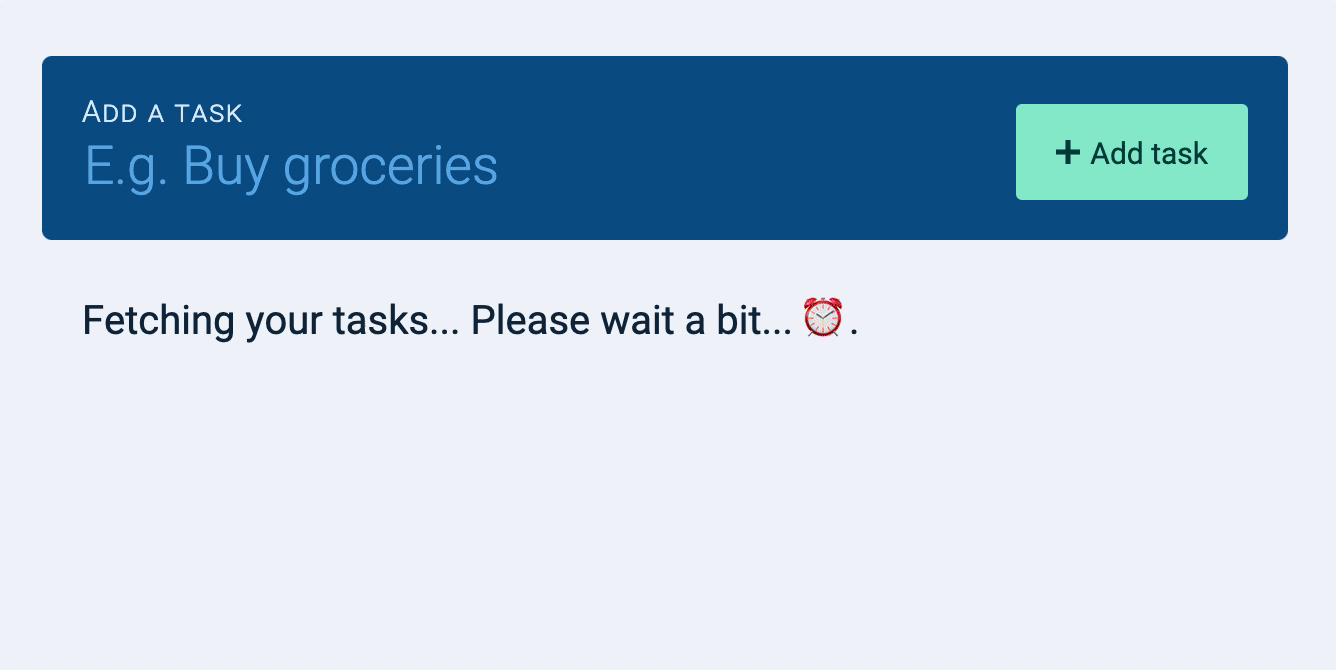
<div class="todolist__empty-state">
  Fetching your tasks... Please wait a bit... ⏰.
</div>

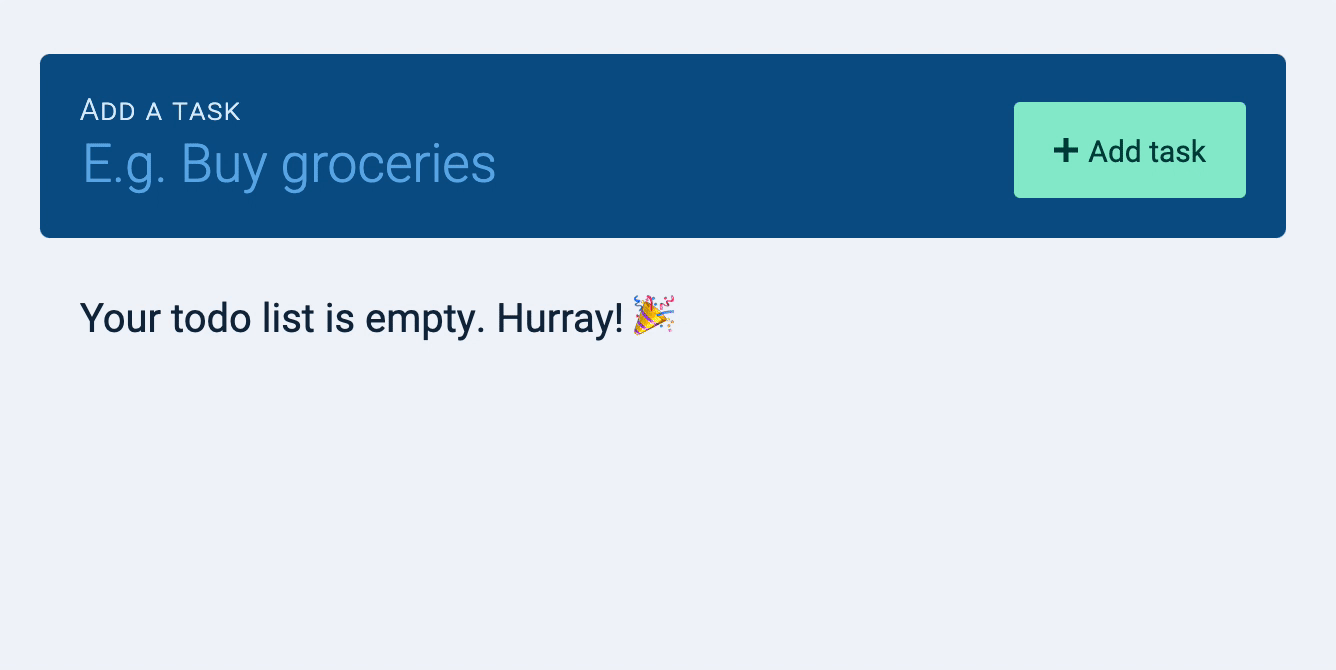
After tasks are fetched, we change the message of the empty state again.

const emptyStateDiv = todolist.querySelector('.todolist__empty-state')

zlFetch(/*...*/)
  .then(response => {
    // Append tasks to DOM...

    // Change empty state text
    emptyStateDiv.textContent = 'Your todo list is empty. Hurray! 🎉'
  })
  .catch(error => console.log(error))
Empty state shows a message that we're fetching the user's task. Tasks then replace the empty state. If the user removes all items, the original empty state message remains.

That’s it!