Using NVDA
Hey ,
I'm thrilled to help you learn JavaScript. Unfortunately, you've landed on a page where you cannot access with your current purchase.
Please upgrade (use this link) access this content.
I'm super eager to help you learn more!
Hey ,
I'm thrilled to help you learn JavaScript. Unfortunately, you've landed on a page where you cannot access with your current purchase.
Please upgrade (use this link) access this content.
I'm super eager to help you learn more!
If you use Windows, I recommend you use NVDA as your screen reader. You can use JAWS if you wish to, but it costs $90 per year.
First, you need to download and install NVDA.
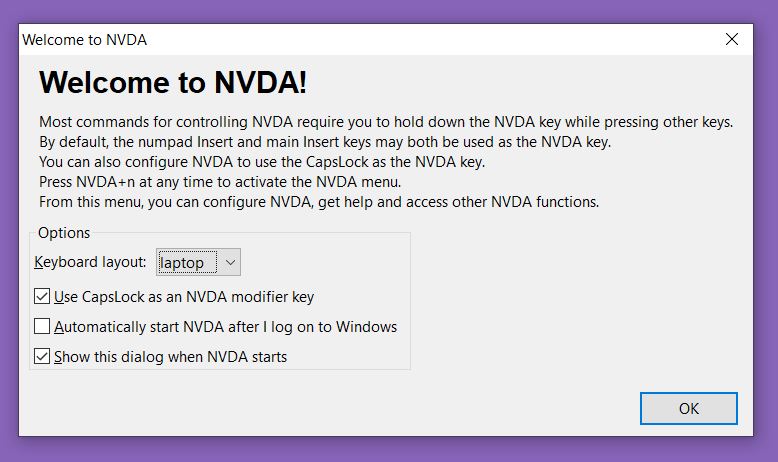
When you open NVDA for the first time, you should see a startup menu. If you’re using a laptop, I recommend you use the following settings:
NVDA has a speech viewer that logs everything NVDA says. This speech viewer helps immensely when you’re reading a screen reader for the first time.
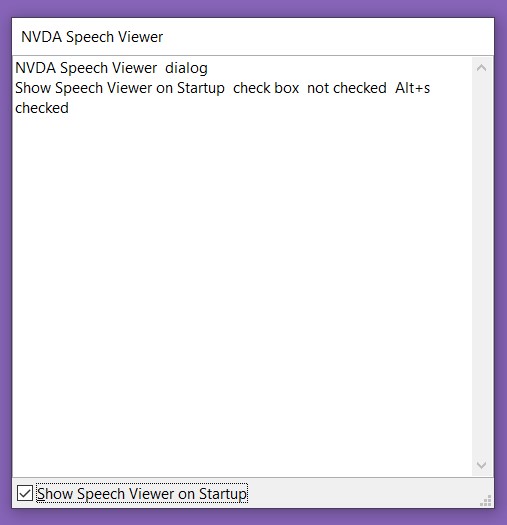
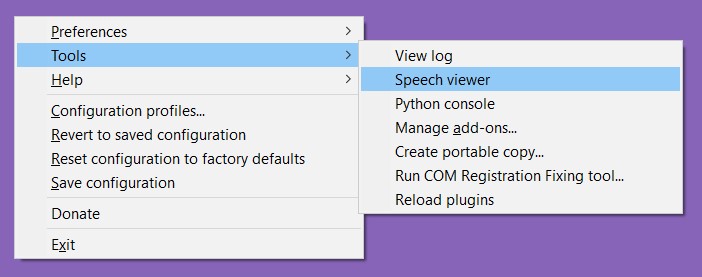
To open the speech viewer, you press the NVDA modifier key + n. Then, navigate to “tools” and select “speech viewer”
(I’m going to say NVDA instead of “NVDA modifier” from this point onwards).
There are four things you want to configure:
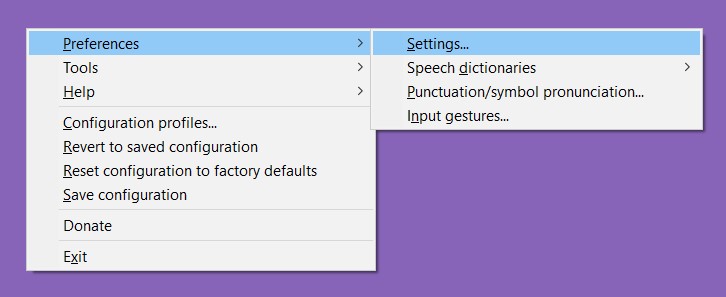
To configure NVDA, you open the NVDA menu with NVDA + n, then navigate to the settings page.
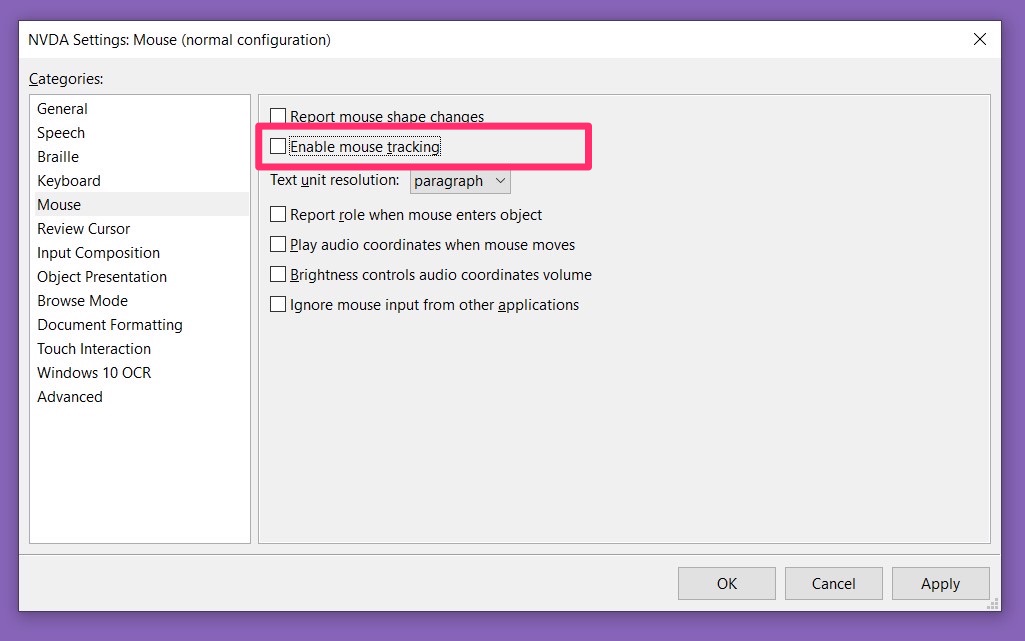
By default, NVDA reads the thing your mouse cursor is on. This can be annoying for mouse users.
You can disable mouse tracking by going into the Mouse menu.
If you want to change the reading speed, you can go to the Speech settings.
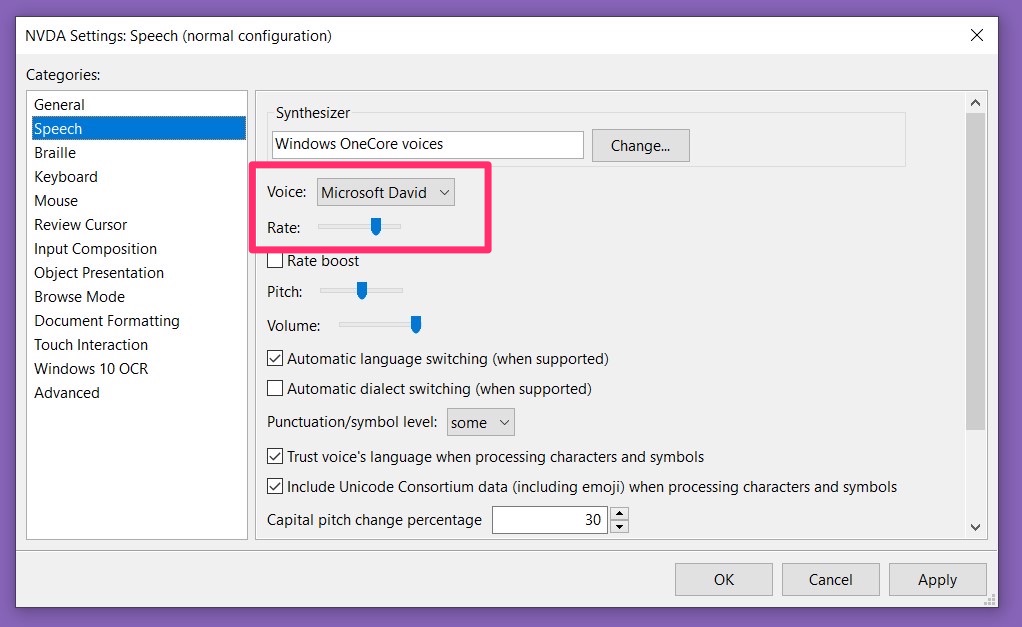
I found NVDA’s default reading speed too slow for my liking, and I increased it to 70 in. (The speech viewer will show the range’s value if you turned it on).
When you enter a website, NVDA begins speaking everything on the website. This can be annoying for developers.
You can disable this feature by disabling the “Say All”

Focus highlight is an NVDA add-on that lets you know where the screen reader is. It’s super helpful.
There are four visual indicators.
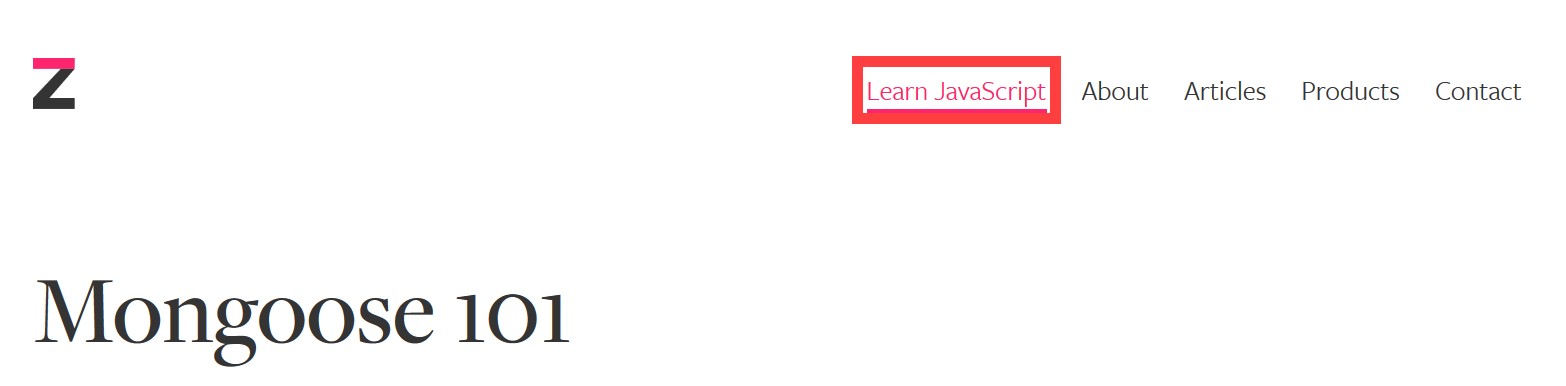
A thick red line shows up when the browser and NVDA focus on the same object. You can activate this by tabbing to a link.
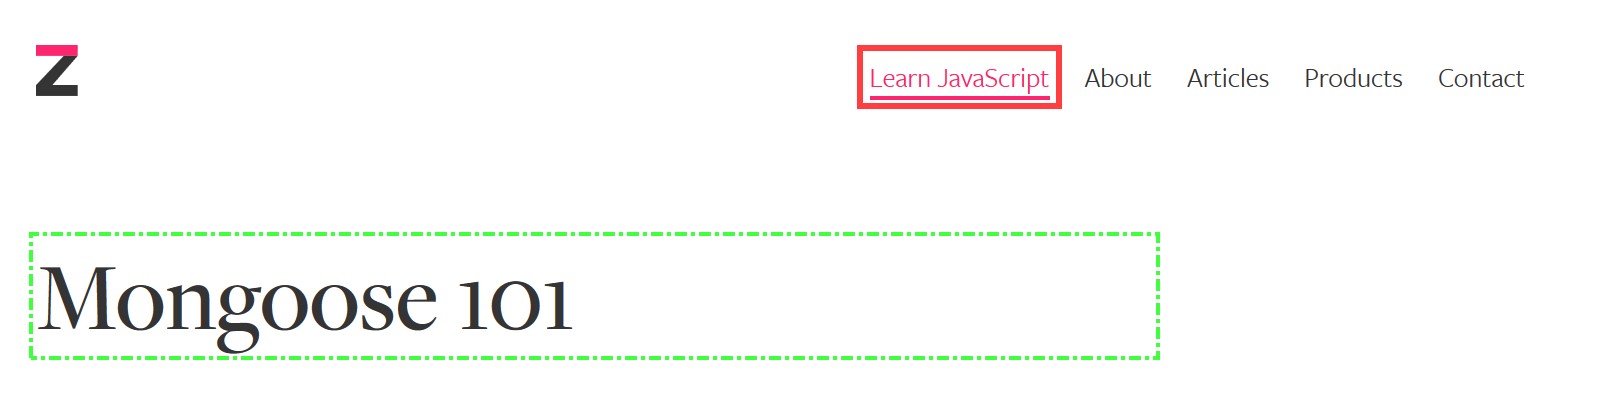
A thin red line and a green dashed line show up when NVDA and the browser focus on different things.
The thin red line signifies where the browser is focusing on. The green dash line signifies where NVDA is focusing on.
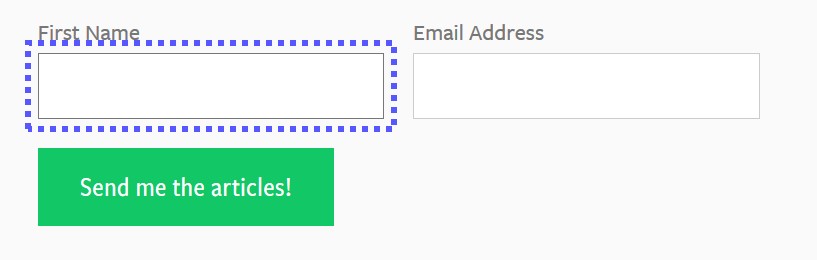
A blue dotted line shows up when NVDA enters into Forms mode.
Here are a few keyboard shortcuts you need to know when using NVDA. Don’t worry about remembering them. Leave this table open as a guide and you’ll get used to the shortcuts.
If you’re interested, you can find a larger list of NVDA shortcuts on WebAim.
| Task | Command |
|---|---|
| Start NVDA | Control + Alt + N |
| Quit NVDA | NVDA + Q |
| Start reading | NVDA + ↓ |
| Stop reading | Control |
| Next item | ↓ |
| Previous item | ↑ |
| Next focusable item | Tab |
| Previous focusable item | Shift + Tab |
| Next landmark | D |
| Previous landmark | Shift + D |
| Next heading | H |
| Previous heading | Shift + H |
| Next item in list | I |
| Previous item in list | Shift + I |
| Exit forms mode | NVDA + Space |
That’s it!